

Shaping tools, spill control, and maintaining contrast in complex environments
In Part I of this series, we examined the principles of chiaroscuro: how directional illumination creates form, how shadows establish depth and how photographic film records these differences as negative density. Part II explored those principles through practical portrait photography, examining lighting ratios, available illumination, film selection and optical rendering.
For this final instalment, the environment becomes more demanding. Photographed by the entire Team Light Lab with model Olga Pastushenko, this constructed interior night scene uses two controlled lighting sources, venetian blinds, negative fill, coloured illumination and atmospheric smoke to demonstrate how light can be contained within a complex space.
The session was photographed on film, including material supplied by Candido Collective, and the resulting negatives were developed and scanned at Liquid Light Lab.
Rather than concentrating on how to create directional light, Part III examines how to prevent that light from reaching areas where it is not wanted. The distinction is fundamental. In a confined interior, controlling reflected illumination can be as important as controlling the primary source itself.

Directional chiaroscuro constructed inside a fully darkened interior. Controlled light shapes the subject through venetian blinds acting as functional flags, while spill and bounce are suppressed to preserve shadow authority and sculptural depth on black and white film.
Containment Before Illumination
One of the greatest difficulties in constructing chiaroscuro within a confined space is unwanted reflected light. A carefully positioned key light may provide the intended modelling across a subject, but nearby walls, floors, ceilings and reflective objects can return illumination to areas intended to remain comparatively dark. The effect can be substantial in small interiors, particularly when the surrounding surfaces are pale.
For this session, the room was darkened before the photographic lights were introduced. This made it possible to establish the contribution of each source and assess where unwanted reflections were entering the scene.
The objective was not absolute darkness, but to create a predictable lighting environment in which illumination could be added deliberately, assessed and controlled.
This approach also made it easier to distinguish between light reaching the subject directly and light reflecting from the surrounding set.
Venetian Blinds as Practical Flags

Venetian blinds functioning as environmental flags: shaping spill, intercepting reflections, and preserving shadow authority while introducing rhythmic structure across the frame.
A flag is an object placed in the path of light to prevent illumination from reaching a particular area. Purpose-built flags are common in cinematography, but the principle applies equally to objects already present within a location.
For this interior scene, venetian blinds performed two related functions. Their slats interrupted the path of illumination, creating bands of light and shadow across the composition. They also restricted the movement of light into selected areas of the set. This gave the blinds a photographic function beyond their appearance as part of the environment.
The resulting shadow patterns contributed to the composition while helping maintain the separation between illuminated surfaces and darker parts of the scene.
A similar approach can be used with doorways, shutters, architectural features and furniture, provided their placement actually obstructs the unwanted illumination.
The broader principle is straightforward: before adding more equipment, examine what the environment already offers for shaping light.
Negative Fill: Controlling Reflected Light
Negative fill is a method of reducing unwanted reflected illumination. Unlike a conventional fill light, which increases illumination on the darker side of a subject, negative fill uses dark surfaces to intercept or absorb light that would otherwise be reflected back into the scene. Black fabric, flags and other low-reflectance materials are particularly useful in confined photographic environments.
During this session, dark fabrics were positioned around the set to reduce reflections that interfered with the intended lighting contrast. Their placement was selective. The intention was to control particular reflections without unnecessarily removing illumination from areas where visible detail remained important.
This distinction matters when photographing on negative film. Less light reaching a shadow area generally produces lower density on the developed negative. If the exposure becomes too low, the negative may contain insufficient information to reproduce useful detail in that region.
Negative fill is an essential consideration alongside exposure. The photographer decides which areas of the subject should remain visible, establishes the lighting relationship and provides sufficient exposure for the shadow information that matters. The finished photograph may contain areas approaching complete black, but this should result from a deliberate photographic choice rather than an unintended loss of recorded information.
Correct development and high-quality scanning can preserve useful tonal differences present on the negative. They cannot reconstruct photographic information that was never adequately exposed.
Used with this understanding, negative fill becomes a precise tool for controlling visual contrast rather than simply making the photograph darker.
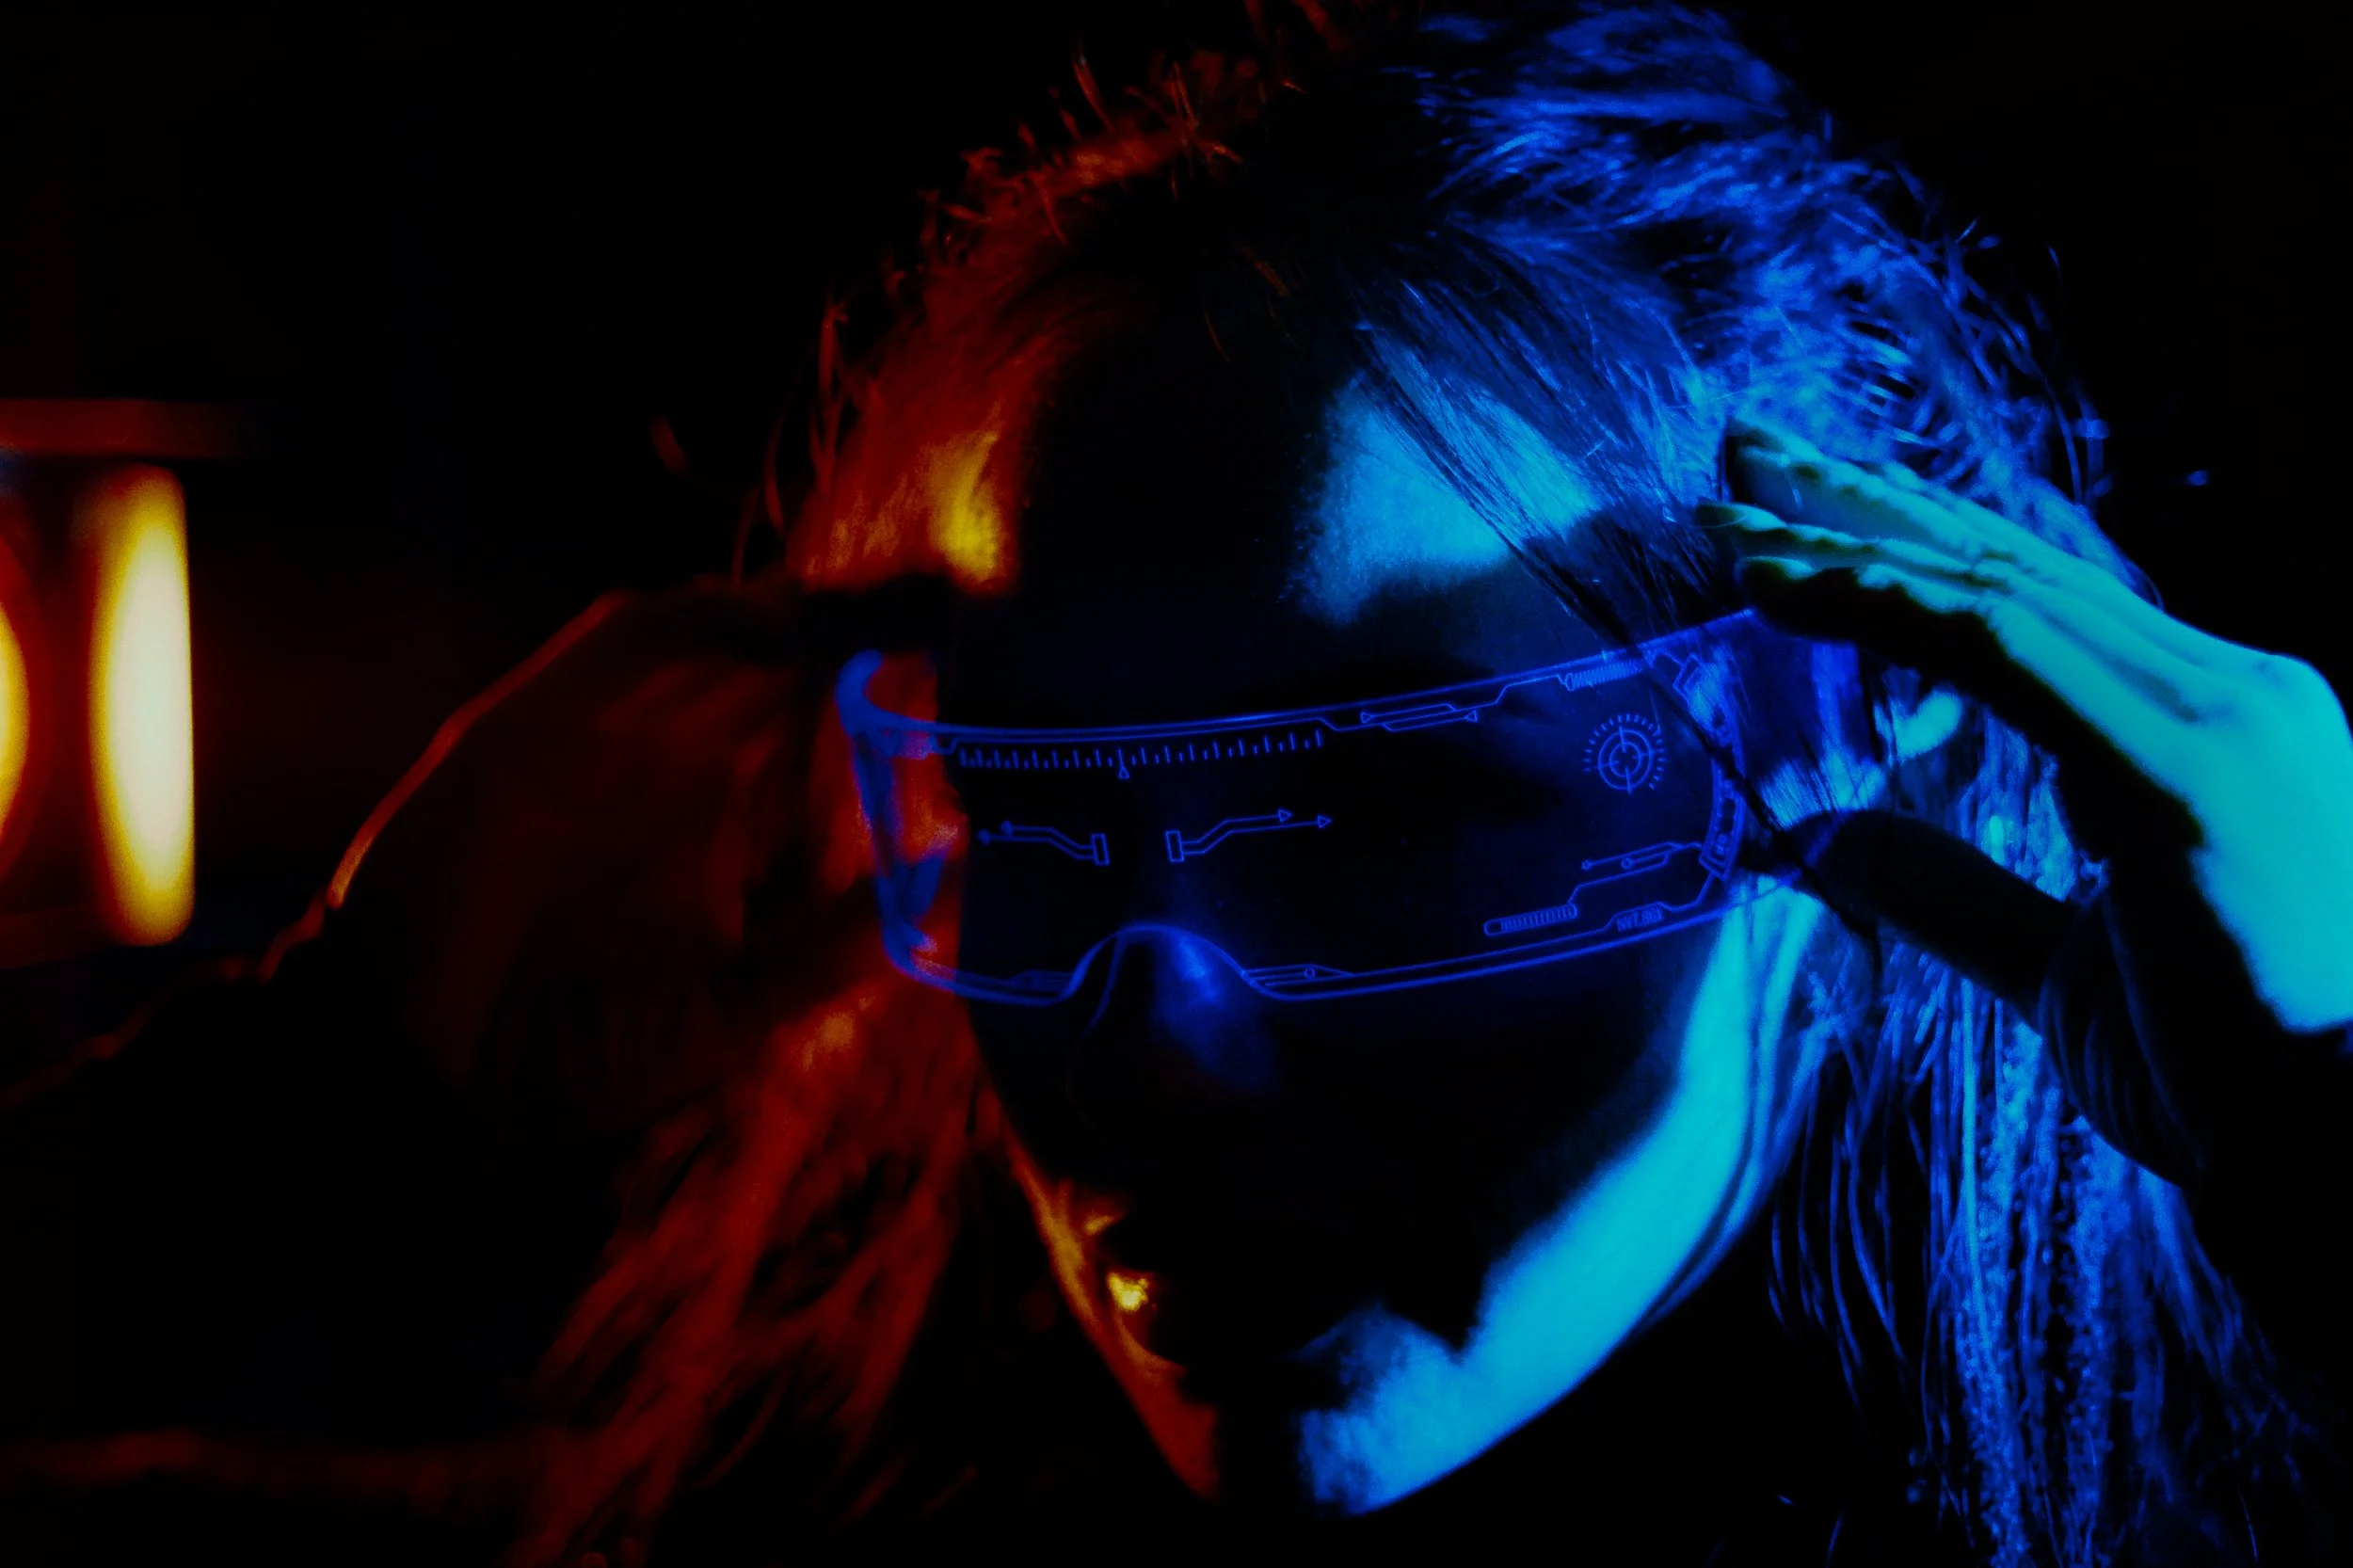
Negative fill is applied to the frontal plane to hold separation between the two controlled sources, while the visor provides a controlled bridge between the illuminated sides without colour contamination. Visible lamp placement and flagging prevent lateral spill and preserve contrast integrity across the face.
Shaping Light With Barn Doors and Grids
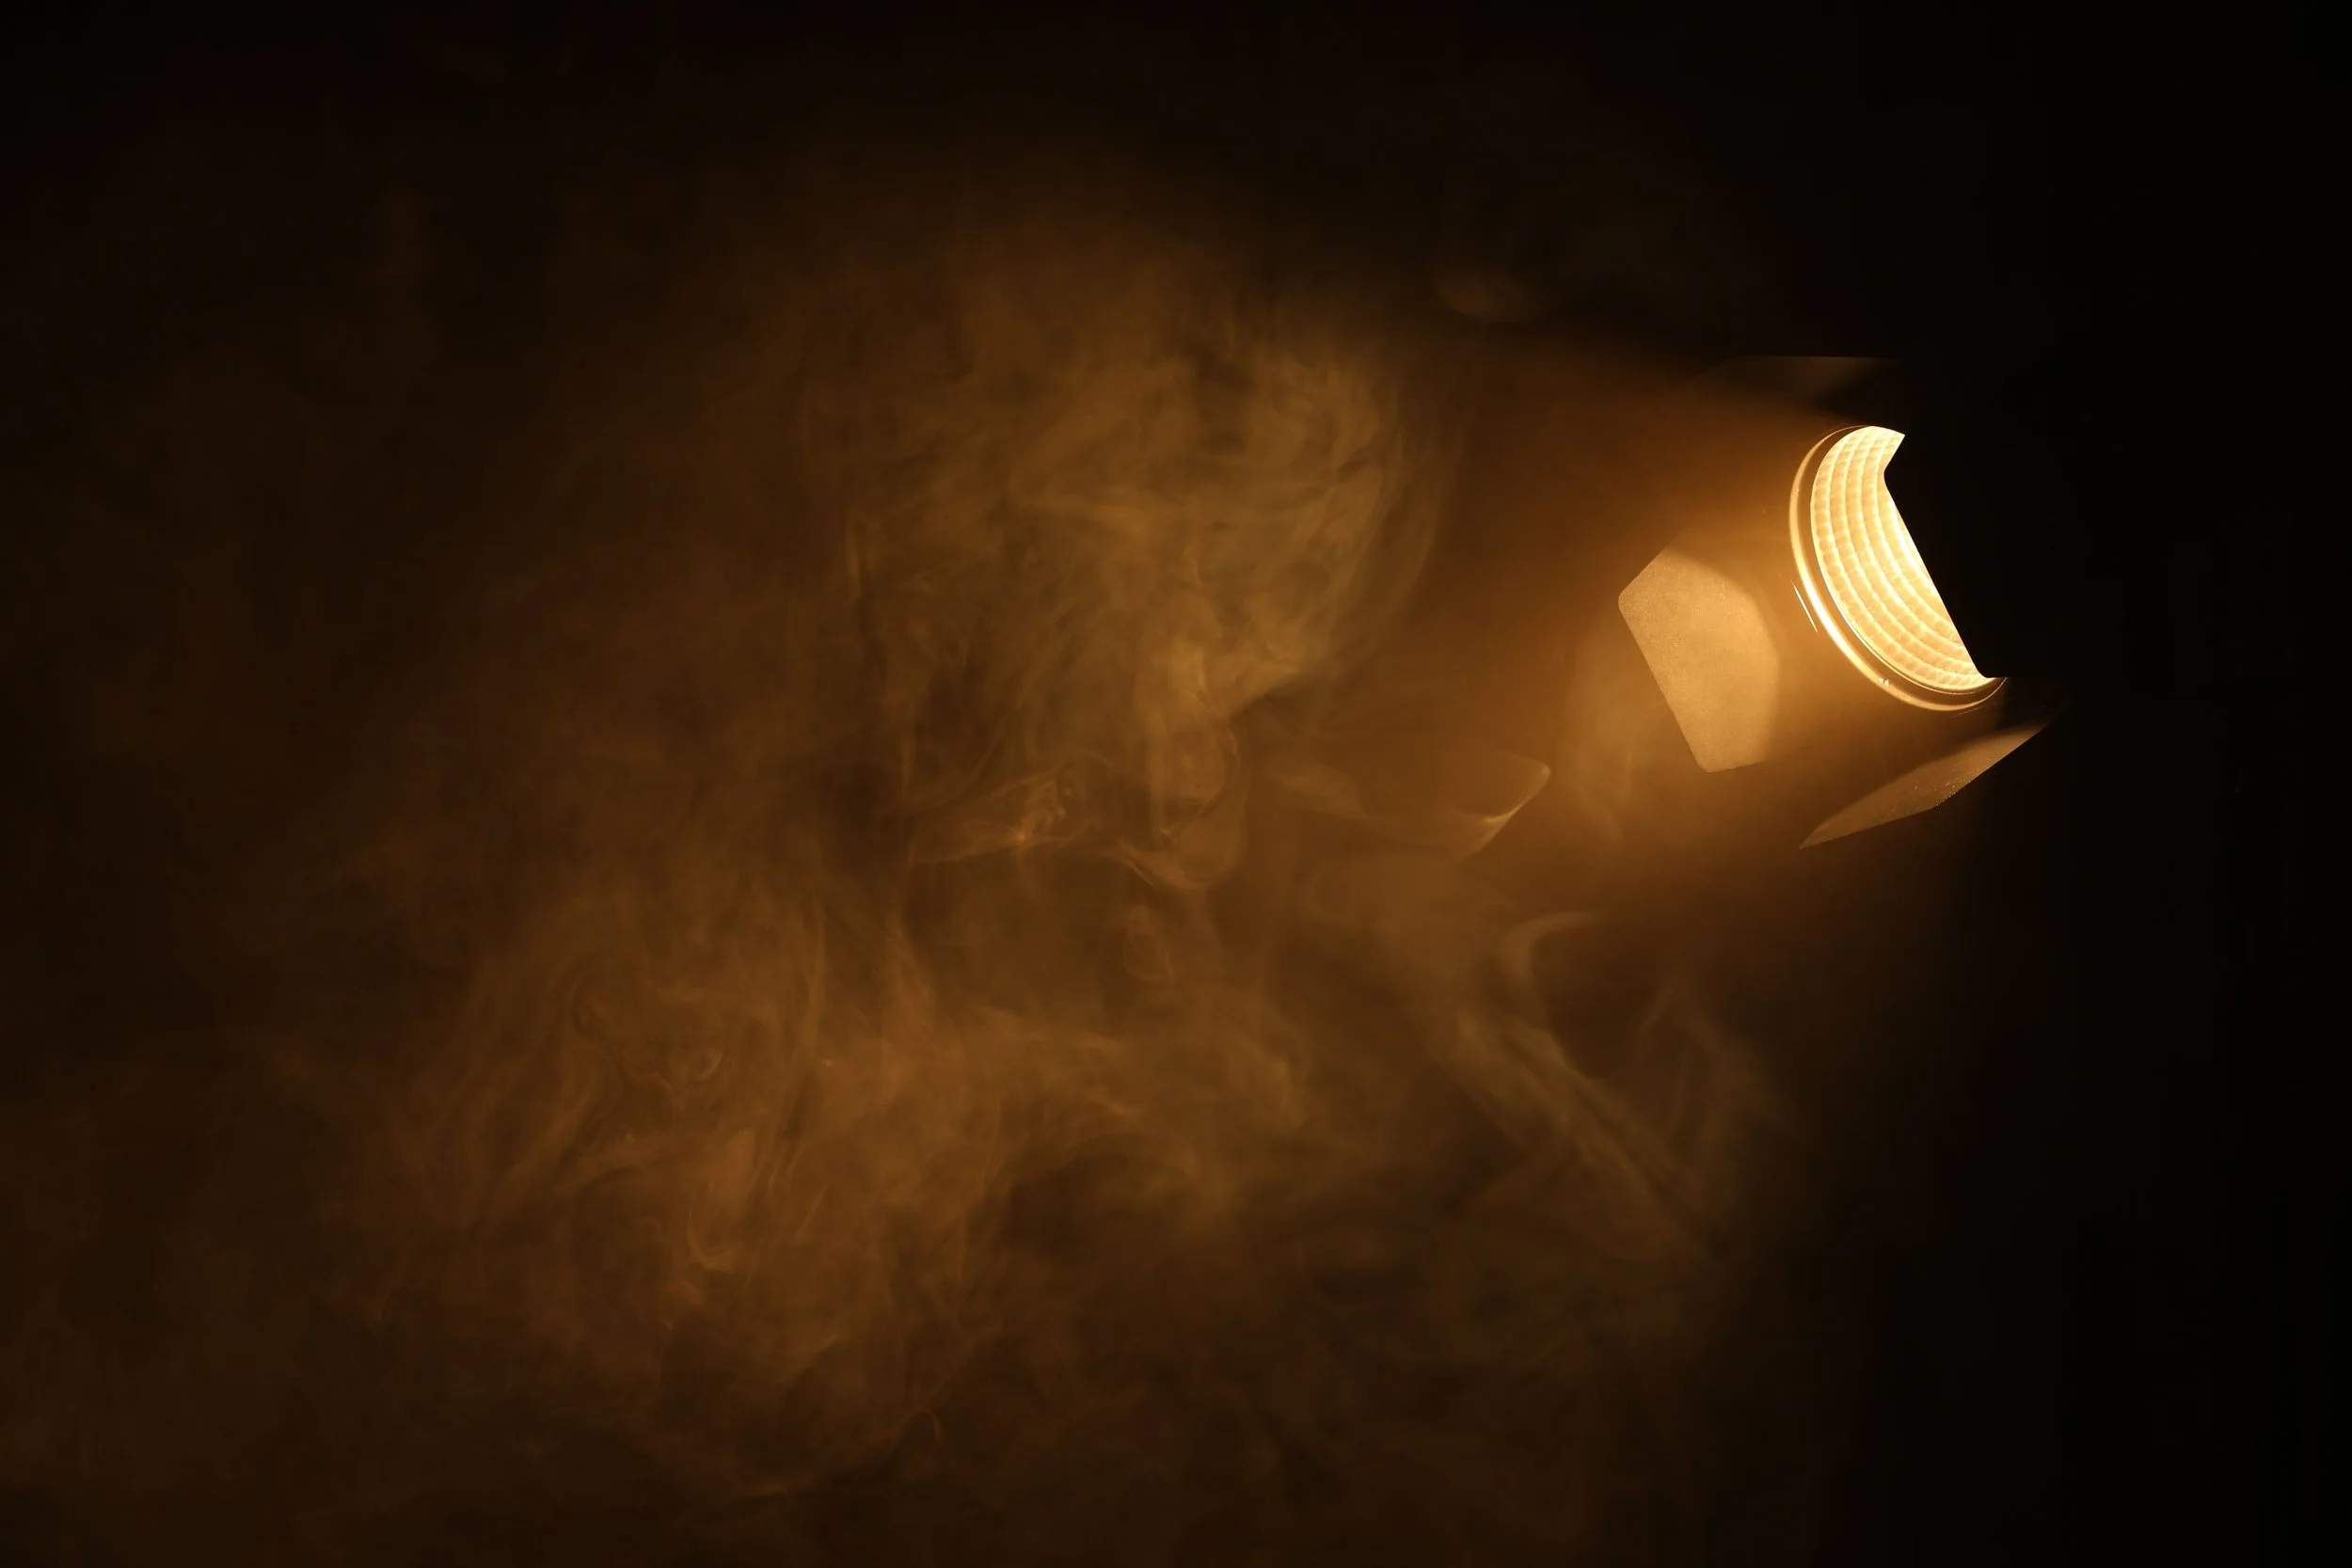
Two continuous lights fitted with barn doors and honeycomb grids controlled the illumination. Colour filtration was applied at the lamps, while smoke made the beam paths visible.
The constructed interior scene used two continuous lighting sources fitted with barn doors and honeycomb grids. Although these tools can be used together, they perform different functions.
Barn doors allow the photographer to intercept portions of a beam, restricting light from reaching selected areas. Their effectiveness depends on the source, the distance to the illuminated surfaces and the geometry of the arrangement.
Honeycomb grids restrict the angular spread of illumination, concentrating the beam and reducing the amount of light reaching the surrounding environment.
Together, they provided more precise control over which parts of the subject and set received illumination. This was particularly important in the darkened interior, where light escaping onto a nearby wall could introduce substantial reflected fill.
The arrangement also allowed coloured light to be introduced without unnecessarily illuminating the entire room.
Colour filtration was applied at the lighting sources, meaning that the resulting colours were physically present in the photographed scene rather than introduced during digital editing.
The Role of the Secondary Light
The second source was used selectively to provide visibility in particular areas, including the eyes, visor and opposing facial surfaces. Its purpose was not to produce an evenly illuminated portrait, and instead introduce a controlled contribution that complemented the dominant lighting arrangement.
This distinction is important because chiaroscuro does not require the exclusion of fill lighting or secondary sources. A carefully positioned fill can preserve important information while maintaining a substantial difference between illuminated and shadowed areas.
What matters is the relationship between the sources. When one source establishes the dominant modelling and the others make restrained contributions, the photograph can retain a strong directional character.
The same principle applies to colour. Two sources with different spectral characteristics may produce distinct colour relationships across a face or reflective object, but those relationships need to be controlled through placement, intensity and exposure.
The Zeiss Pancolar 50mm f/1.8
The entire session was photographed using the Zeiss Pancolar 50mm f/1.8. Unlike the three-lens comparison in Part II, this provided a consistent optical arrangement while the lighting environment was developed and refined. The lens influences how the scene is projected onto the negative, including its contrast transmission, resolution, aberrations and flare characteristics.
The physical lighting arrangement, however, determines where illumination falls and how the subject is modelled. Keeping the lens consistent allowed the photographic emphasis to remain on the changing relationships between light, shadow, colour and the surrounding set.
Colour, Reflections and Atmospheric Smoke
Coloured lighting introduces additional variables into a photographic environment, particularly when reflective, translucent or atmospheric materials are present.
The final colour recorded by film depends on several interacting factors. The spectrum of the light source, any filtration, the reflective characteristics of the subject and surrounding materials, and the spectral sensitivity of the film all influence the resulting negative. A coloured surface may reflect certain wavelengths more strongly than others. A translucent or reflective object may introduce additional light paths, while the position of the camera and source can change which reflections are visible.
These differences become especially noticeable when strongly coloured illumination is used against an otherwise dark environment.
For this session, coloured light was introduced directly through filtration at the lamps. This allowed the colour relationships to be established photographically, as part of the scene itself.
Using Smoke to Reveal Light
Atmospheric smoke was introduced into selected photographs to make the paths of illumination visible and add depth to the constructed environment. Smoke scatters light as it passes through the air. This allows a directional beam to become visible between its source and the surfaces it illuminates. The effect can be particularly striking when combined with narrow beams and coloured lighting.
Rather than blocking a defined portion of a beam, smoke scatters and attenuates light throughout the volume it occupies. Depending on its density, it may also introduce veiling illumination and reduce the apparent contrast of the scene. A light atmospheric concentration can reveal the structure of the beam while leaving much of the scene's contrast intact. Greater concentrations may soften the image and obscure details.
The photographs demonstrate this relationship between physically shaped illumination and light made visible through the atmosphere.
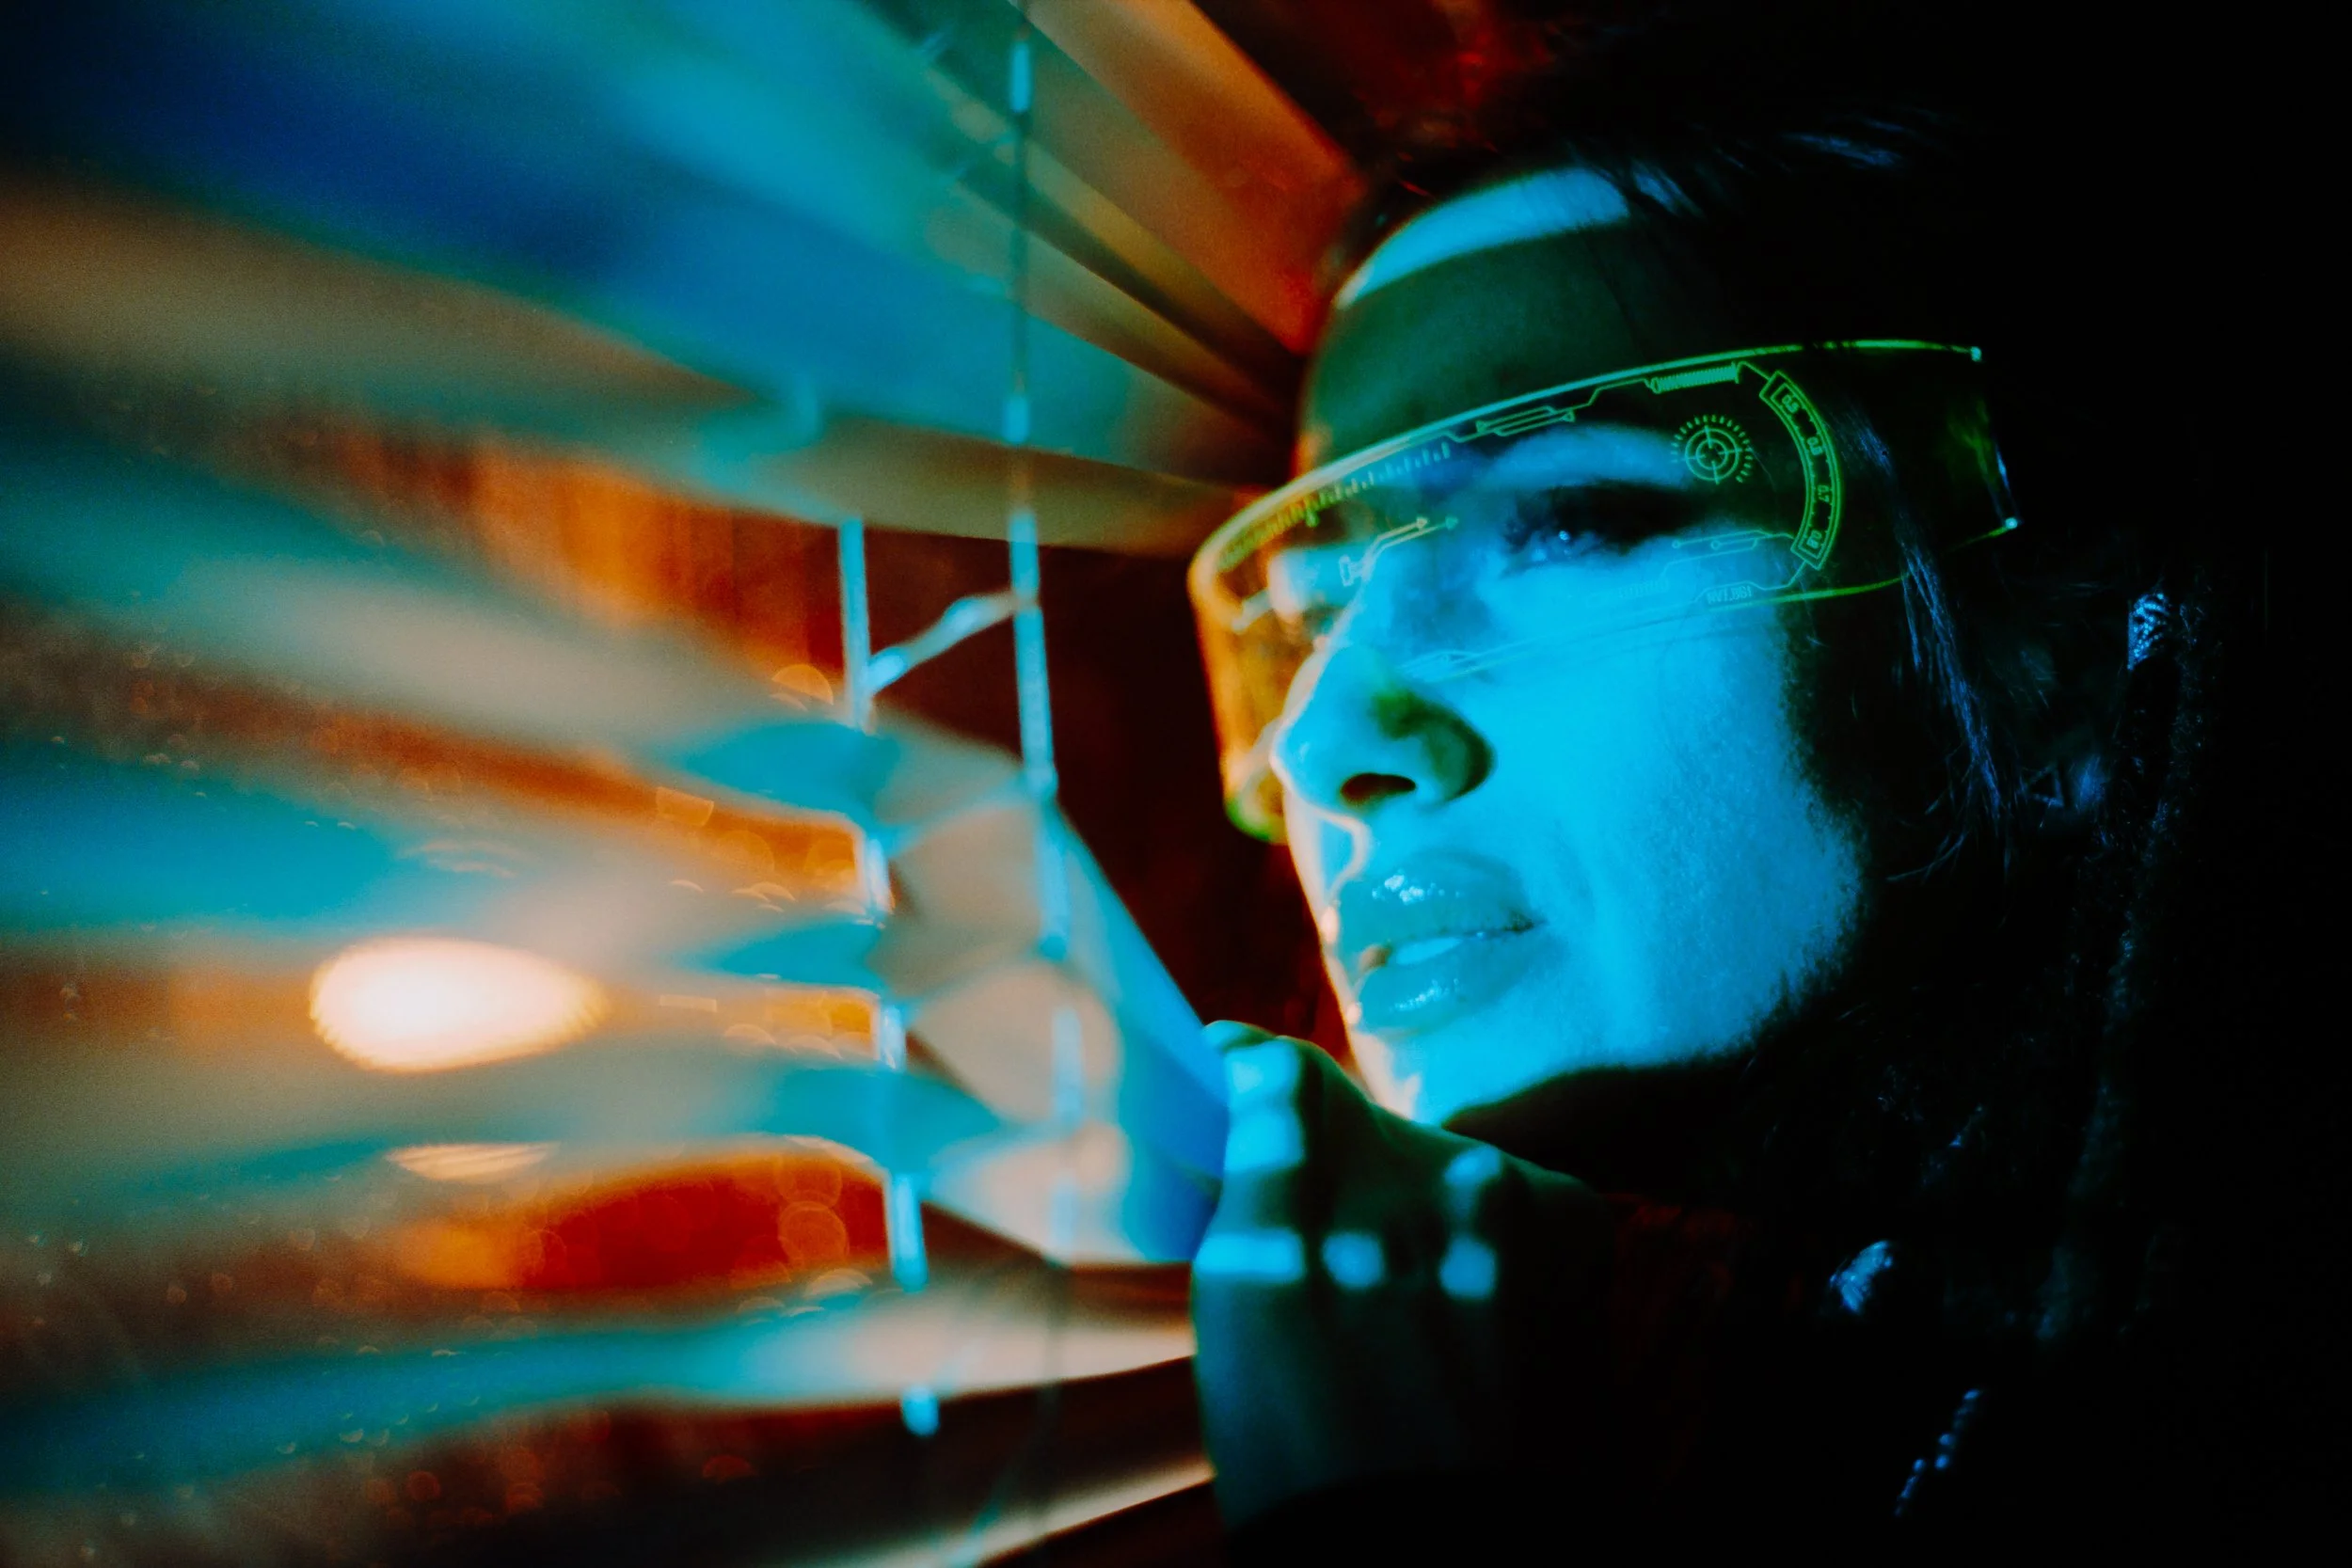
Coloured illumination, reflections and atmospheric smoke reveal the beam structure and colour relationships recorded on colour-negative film.
Recording Coloured Light on Film
Colour-negative film records the interaction between the illumination and the subject through its separate colour-sensitive emulsion layers. The resulting negative contains the colour and density relationships established during exposure, modified by the characteristics of the emulsion and its development process.
Scanning introduces another important stage. The interpretation of colour-negative film requires the recorded dye densities to be converted into a positive image. Decisions made during this process affect how the colour relationships are represented in the finished photograph.
At Liquid Light Lab, our approach to scanning is informed by these relationships. The objective is to reproduce the information present in the negative with sufficient tonal and colour flexibility for the photographer's intended result, rather than allowing the scanning process to unnecessarily restrict the recorded differences. In a scene built around strongly coloured light and deep shadows, this is especially important.
From the Studio to the Negative: Candido and Liquid Light Lab
Film for this photographic session was supplied by Candido Collective, with whom Liquid Light Lab maintains an international technical partnership. As Candido's Technical Partner and Ambassador, our involvement extends beyond photographic testing. It includes producing the company's online technical data sheets and printed film instructions, evaluating new emulsions and contributing practical guidance on exposure, processing and scanning.
Professional photographic work forms an important part of that experience. Sessions such as this provide opportunities to evaluate how photographic emulsions respond to demanding lighting conditions, including strong colour separation, substantial differences between illuminated and shadowed areas, and complex reflections.
The negatives from this shoot were developed and scanned at Liquid Light Lab.
Development establishes the negative's final dye or silver densities according to the film and processing chemistry. Scanning then determines how effectively those recorded differences can be captured and reproduced. Our scanning solution uses high-resolution chamber-based capture, precision optics and controlled illumination to digitise photographic negatives.
For scenes such as these, scanning quality is not simply a question of how many pixels are produced. The ability to retain useful tonal separation, reproduce the available negative density range and interpret colour consistently is central to the finished result. These principles apply equally to our customers' photographs, whether they are working with straightforward daylight exposures or more demanding studio lighting.
The connection between professional photography, manufacturer technical work and daily film development is an important part of Liquid Light Lab's approach. The same practical questions remain throughout: what did the film record, how was that information affected by development, and how accurately can it be reproduced?
Maintaining Consistency Across a Photographic Sequence
Constructing an individual photograph with controlled directional light is one challenge. Maintaining that relationship across a sequence introduces another. A change in the subject's position may alter the illumination across the face. Moving a reflective object can introduce unwanted highlights, while relatively small adjustments to a light source may change the amount of spill reaching the background.
In a darkened interior, these differences can be particularly visible. Maintaining consistency requires continued observation rather than assuming that a successful initial setup will remain unchanged. The dominant direction of light, the contribution of secondary sources, the amount of reflected illumination and the intended exposure must all be considered as the scene develops.
The final photographs from this session demonstrate the value of that discipline. Rather than continually adding illumination, refinement often involved reducing it: restricting a beam, controlling a reflection or repositioning a flag to preserve the intended relationship between light and shadow.
The purpose is not to remove all detail from the darker parts of the frame, but to decide deliberately where that detail belonged.
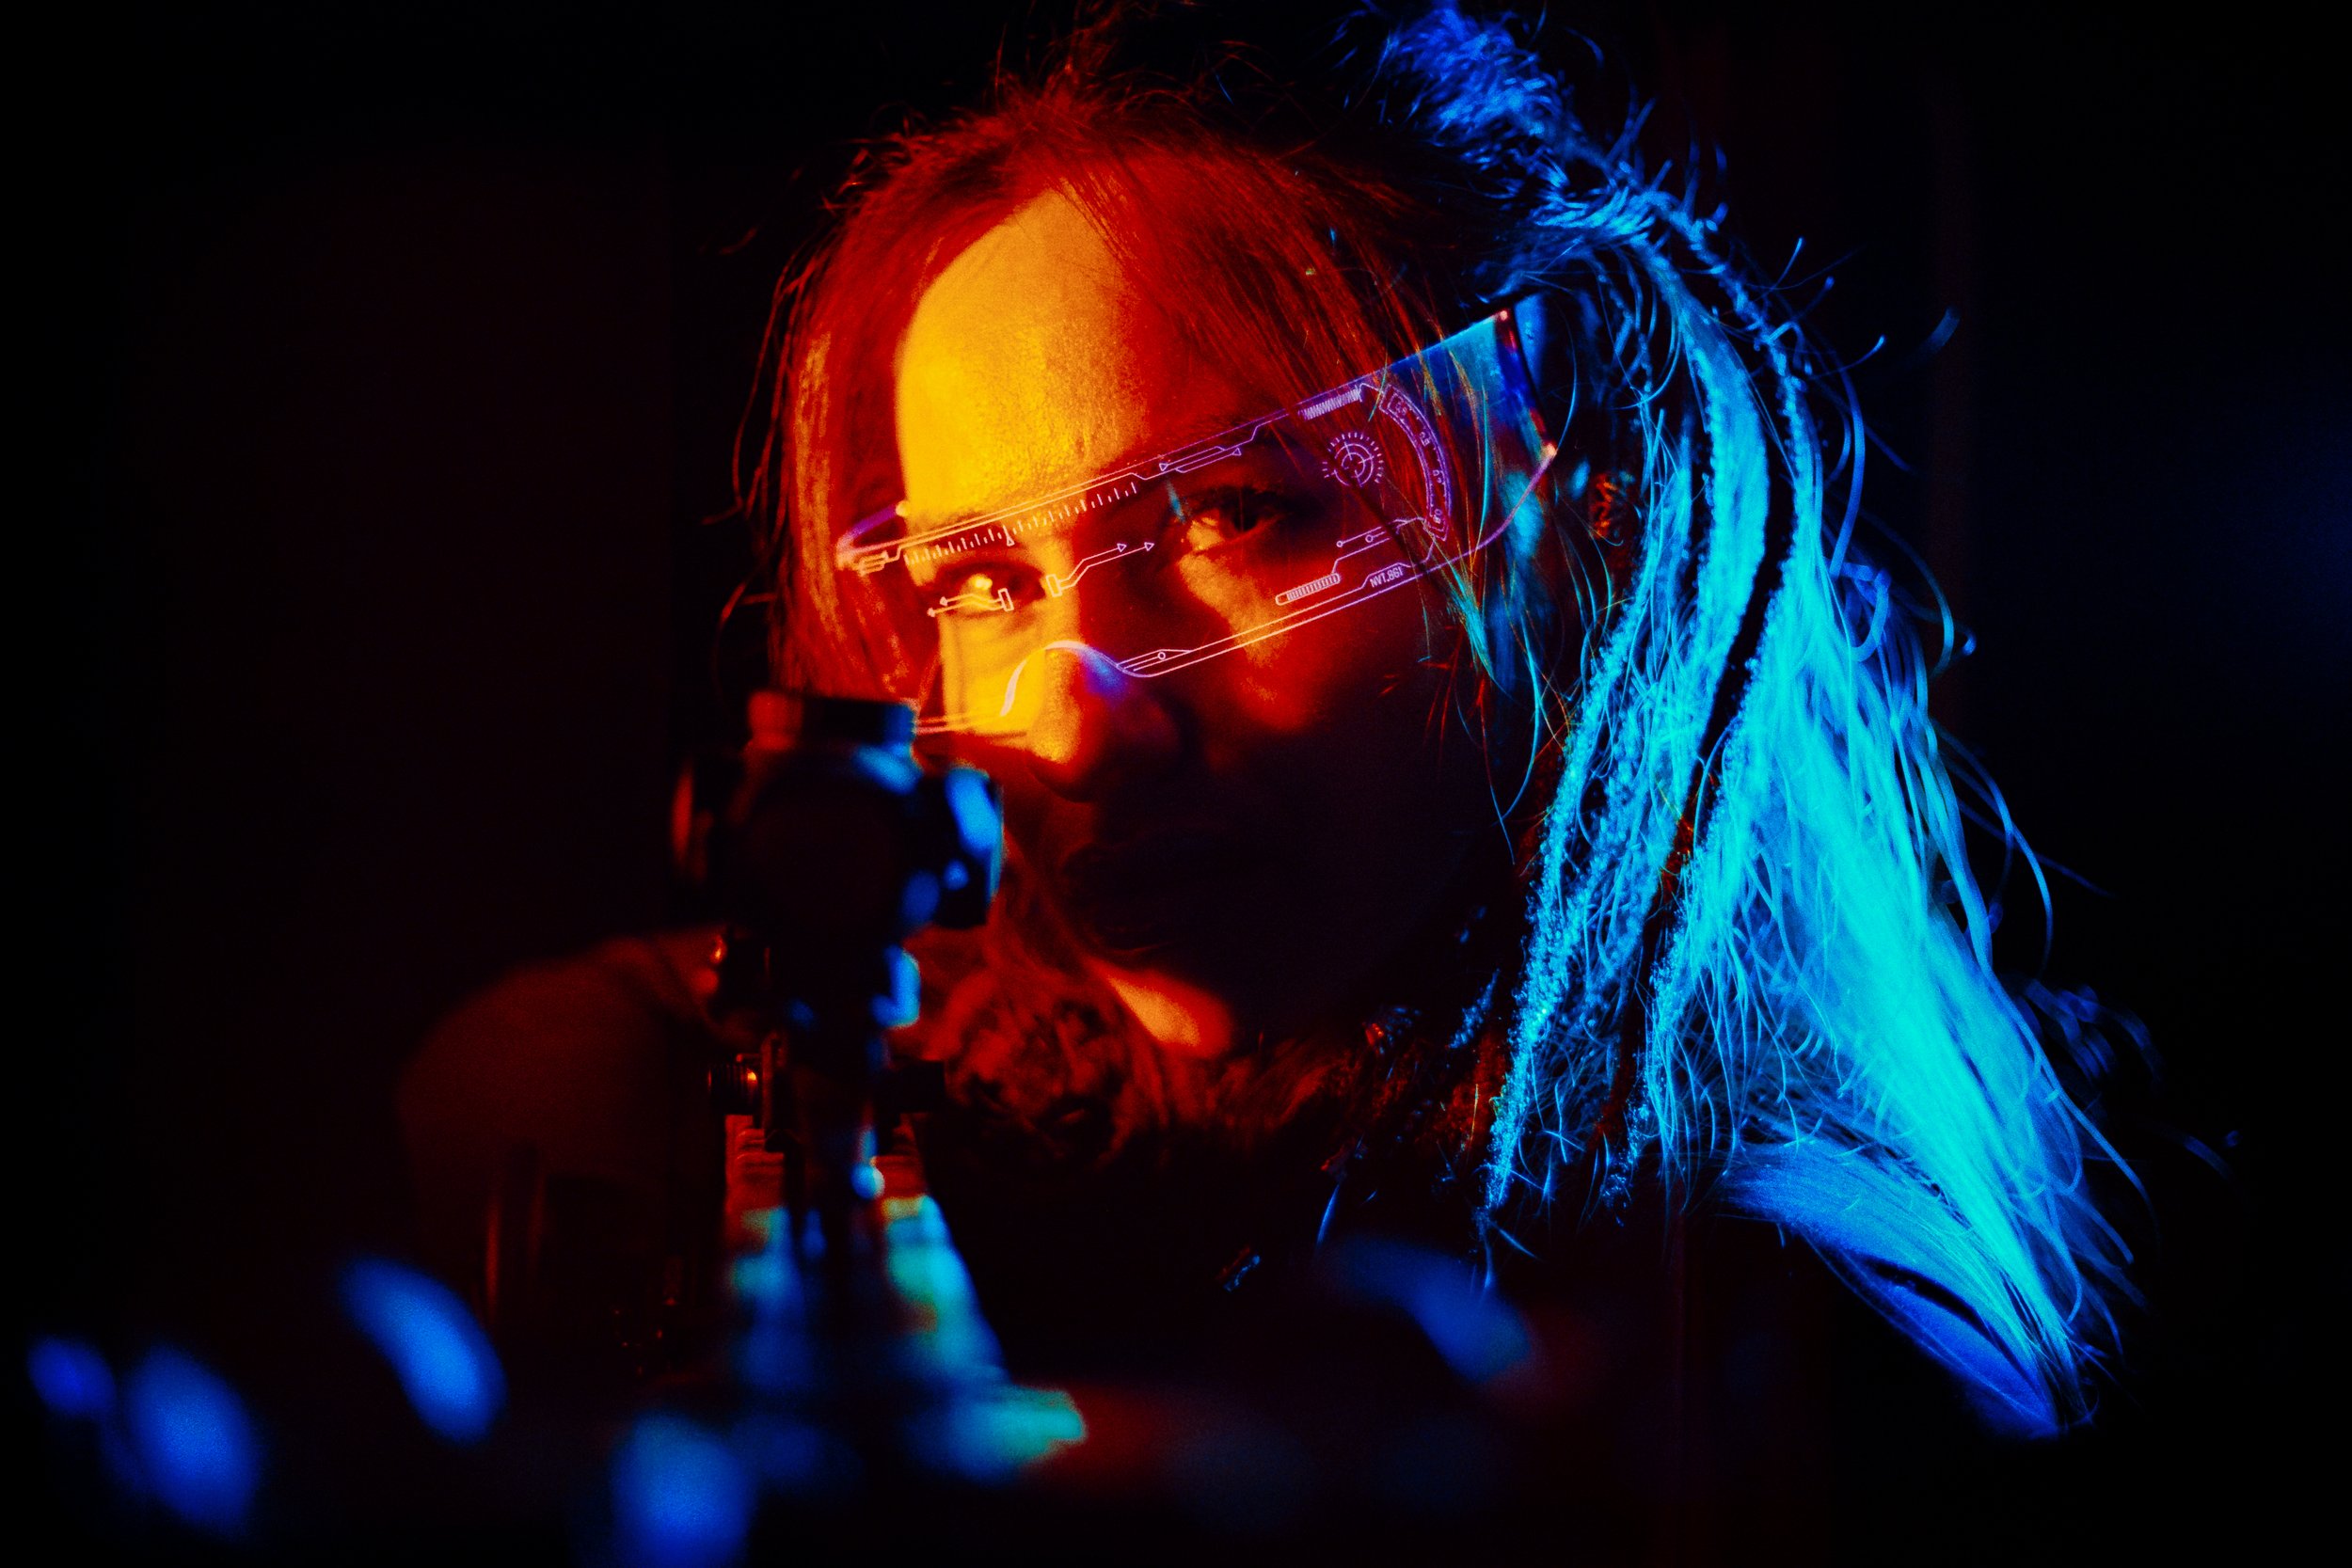
Final refinement achieved through subtraction: spill suppressed, bounce removed, and visibility reduced to preserve contrast and structural depth.
Conclusion: From Light to the Finished Photograph
Across this three-part series, chiaroscuro has been explored as a photographic method rather than simply a visual style. Part I established the principles of directional light, tonal separation and the way film records differences in exposure. Part II demonstrated those principles through professional portrait photography, examining the interaction between lighting, lenses, film stocks and exposure. Part III has taken the process further, showing how a more demanding environment can be controlled through flags, negative fill, grids, secondary illumination and deliberate management of reflections.
Together, the three studies demonstrate that the appearance of a photograph is established through a sequence of connected decisions. The photographer determines the illumination and exposure. The chosen film records the scene according to its sensitometric characteristics. Development establishes the resulting negative, and scanning reproduces that information for the finished photograph.
For Liquid Light Lab, this relationship is fundamental. Our professional film development and high-resolution scanning services are informed by continuing photographic practice and direct technical involvement with film manufacturers, including Candido Collective.
Understanding what photographers are trying to achieve before they release the shutter is an important part of understanding how their negatives should be handled afterwards.
Explore Film Developing and Scanning at Liquid Light Lab
Read the Complete Chiaroscuro Series
Part I — Directional Light on Film: The Foundations of Depth, Shape and Tonal Control
Part II — Directional Light on Film: Building the Chiaroscuro Portrait
Photography and lighting: Team Light Lab
Model: Olga Pastushenko
Film supplied by Candido Collective
Film development and scanning: Liquid Light Lab
The Cinematic Notebook | Liquid Light Lab