

Directional lighting becomes particularly interesting when it moves from theory into practical portrait photography.
In Part I of this series, we explored how chiaroscuro uses illumination and shadow to create depth, and how photographic film records those differences as negative density.
Part II examines those principles through an original studio session photographed by Team Light Lab with model Ella Rue. Working with continuous light, available window illumination, three different 50mm lenses and both black-and-white and colour-negative film, the session demonstrates how lighting decisions influence the finished photograph.
The negatives were subsequently developed and scanned at Liquid Light Lab, connecting the photographic decisions made on set with the technical processes responsible for reproducing the images.
The emphasis here is practical: establishing a lighting ratio, controlling unwanted reflections, selecting suitable film and understanding how different lenses render the same lighting environment.
Establishing the Light on Set
The room presented an important starting condition: large windows introducing existing illumination into the scene. Rather than eliminate that light, we began by assessing the illumination reaching the shadow side of the subject.
A continuous lamp fitted with a large parabolic modifier was then positioned to establish the dominant direction of light. Its placement was designed to complement the natural window illumination, producing a coherent relationship between the artificial and available sources.
We then adjusted the key light and compared readings from the illuminated and shadowed sides of the subject, establishing the contrast while allowing sufficient exposure for the shadow detail we wanted to retain.
Conversely, reflected light from the surrounding walls could provide useful, restrained illumination without introducing an additional lamp. This is an important principle of practical studio lighting: the room itself becomes part of the lighting arrangement.
The successful result depends not simply on positioning a light, but on understanding everything that happens after that light strikes the subject and surrounding environment.
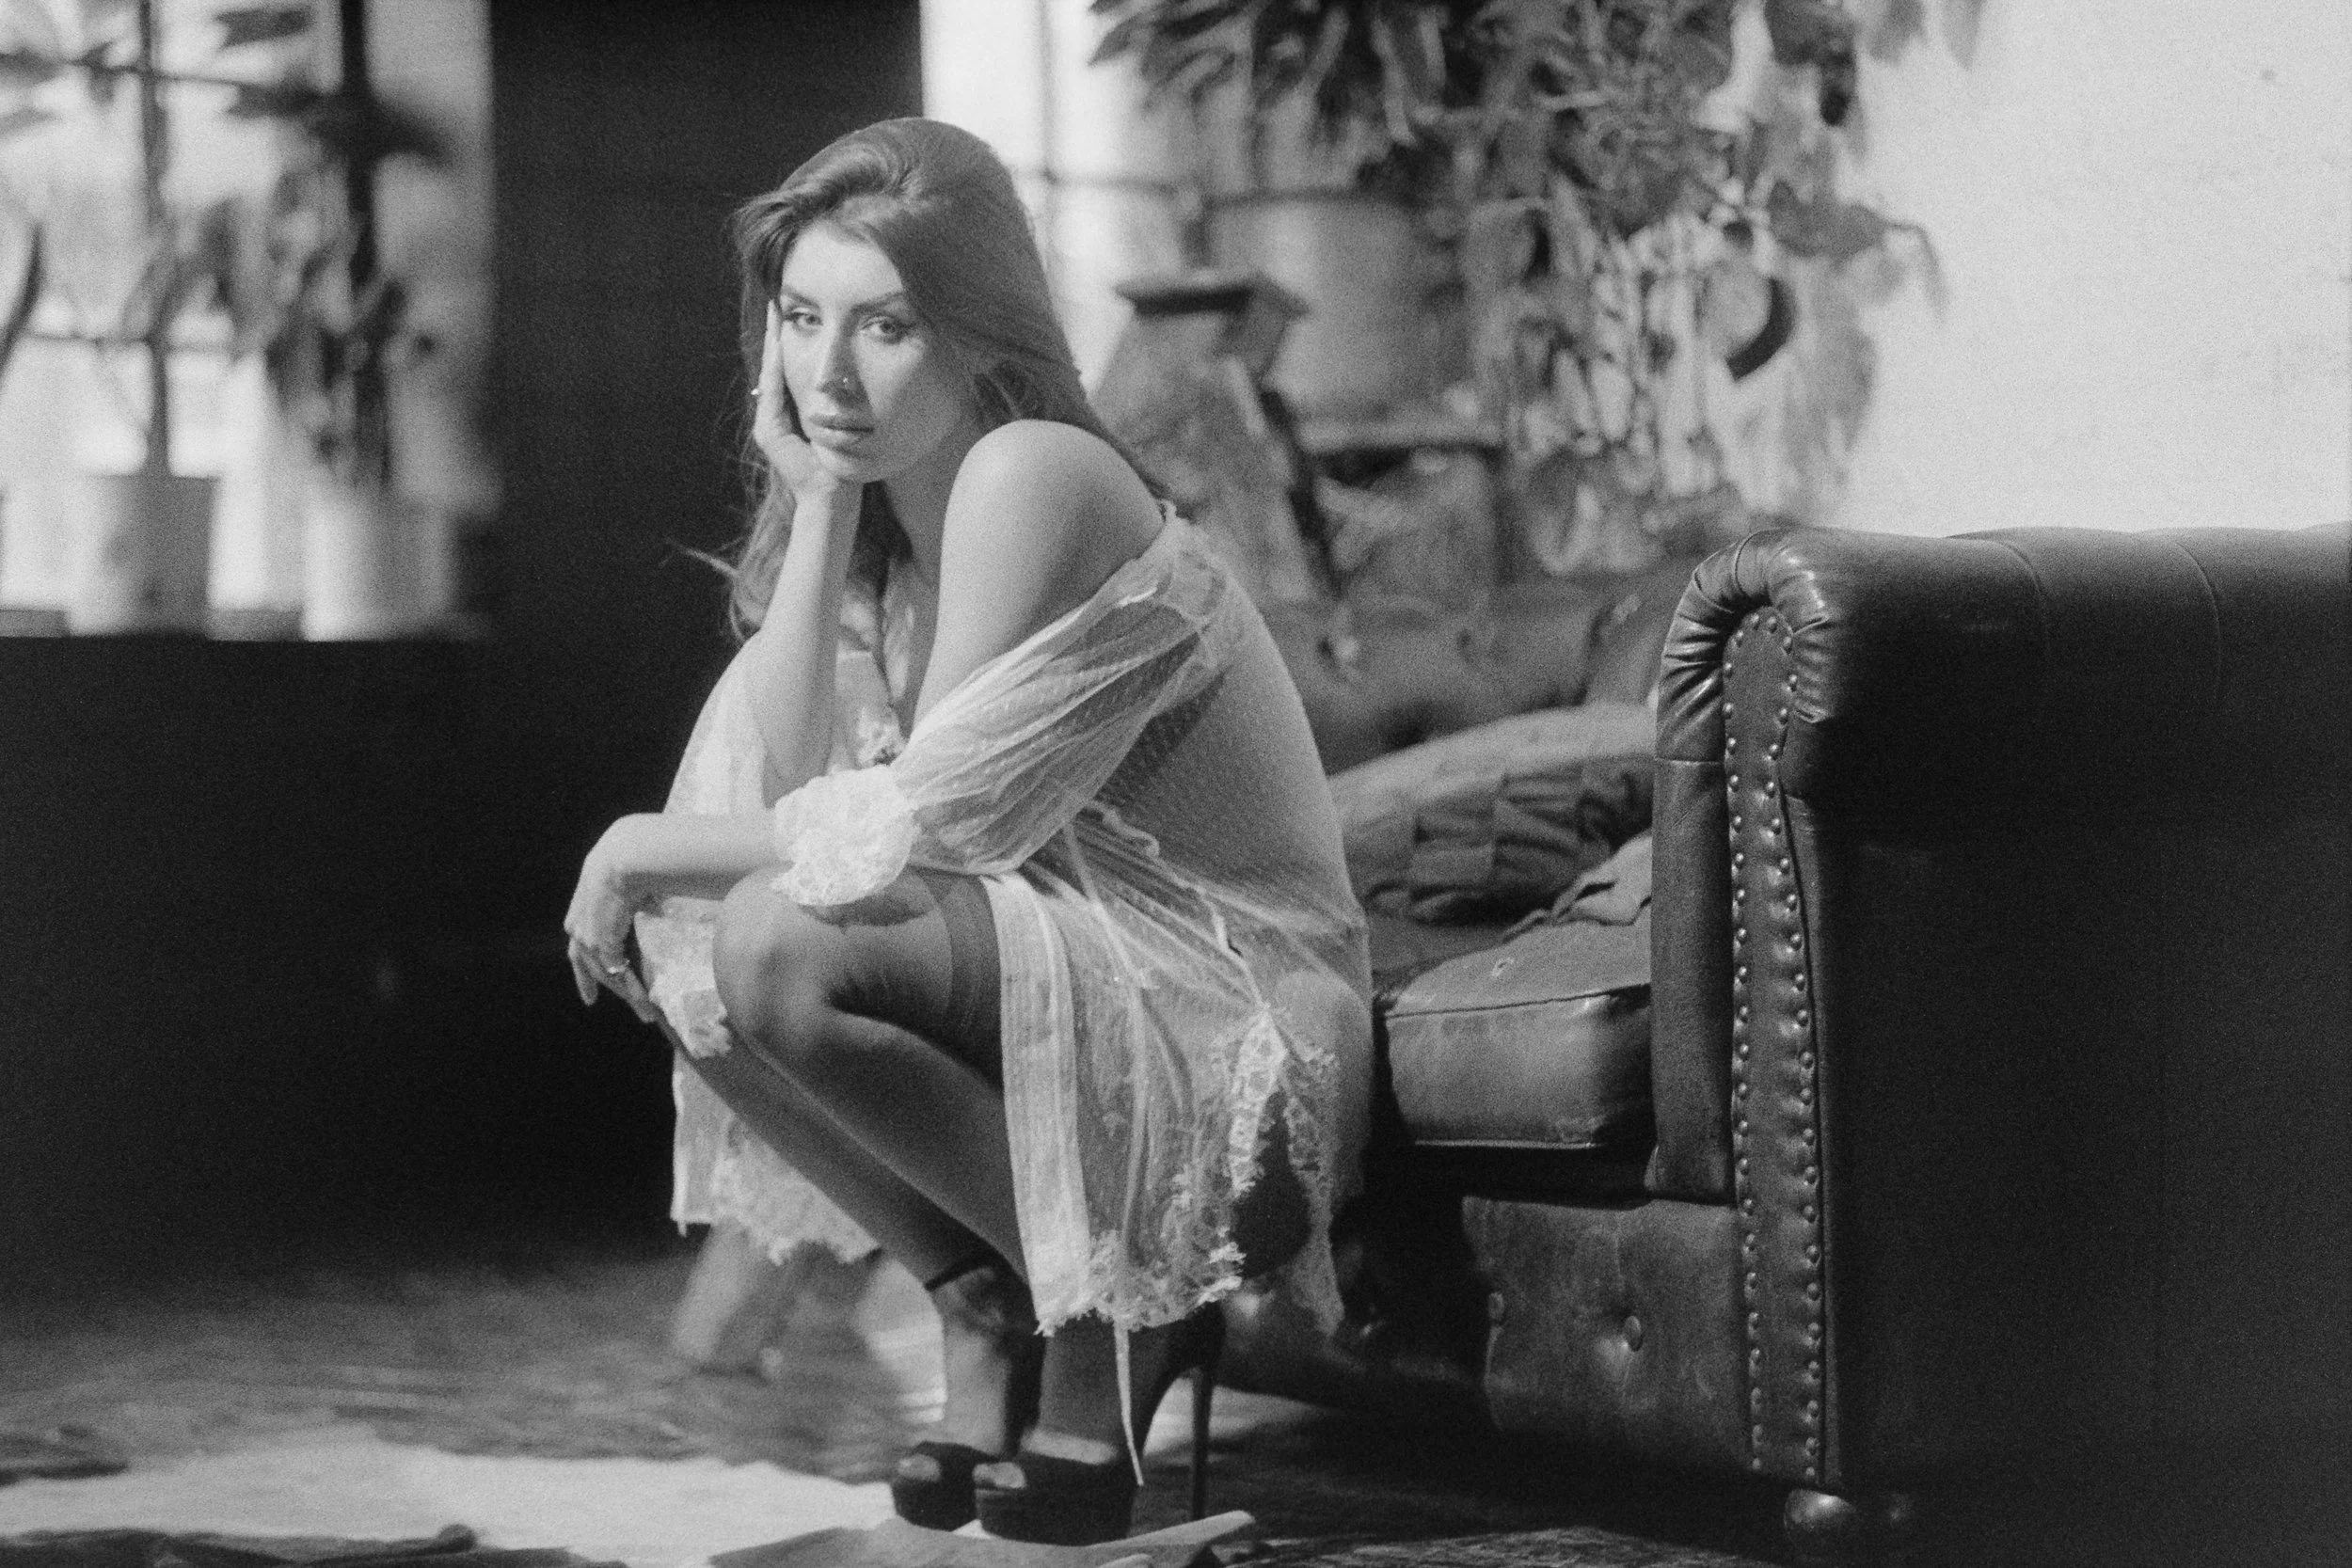
Ella Rue photographed on Rollei RPX 100 with a 1939 Zeiss Sonnar 50mm f/1.5. A directional key establishes the illuminated facial planes, while restrained ambient fill maintains separation in the darker areas. The negative was developed in 510 Pyro and scanned at Liquid Light Lab, illustrating the relationship between lighting contrast, exposure and black-and-white tonal reproduction.
How the Ratio Was Built On Set
Because the room had large windows, the first step was to measure the ambient light on the shadow side of the subject. This establishes the baseline density. Once that reading was set, the key light—a single continuous lamp with a parabolic modifier—was brought in gradually until the illuminated side of the face and torso reached the desired separation from the shadow reading.
This approach keeps the lighting coherent. Instead of fighting the existing ambient light, the ambient becomes something to control and shape. If the windows lifted the shadows too much, a simple piece of negative fill was added to draw the density back into alignment with the intended ratio. Everything remained based on that first decision: which side would be the shadow side, and how deep the shadow should be.
The result is a lighting structure that does not drift. Once the ratio is set, the rest of the portrait is built around it.
“I cannot recommend Martin highly enough for anyone looking for an exceptional photographer who truly understands the art of light. They are incredibly respectful and creates a safe, comfortable environment on set. ”
The Room as Part of the Lighting System
Chiaroscuro does not require isolating the subject from the environment. In practice, the environment is part of the toolset. Walls can lift shadows gently, narrow rooms deepen falloff, and furniture blocks spill in ways that help maintain directionality.
In this session the environment played a controlled role: the wall opposite the key light provided just enough reflected lift to keep the shadow plane readable without softening the sculptural depth. The background naturally fell away as the parabolic modifier shaped the light forward rather than outward. No second light was needed. The room became the modifier.

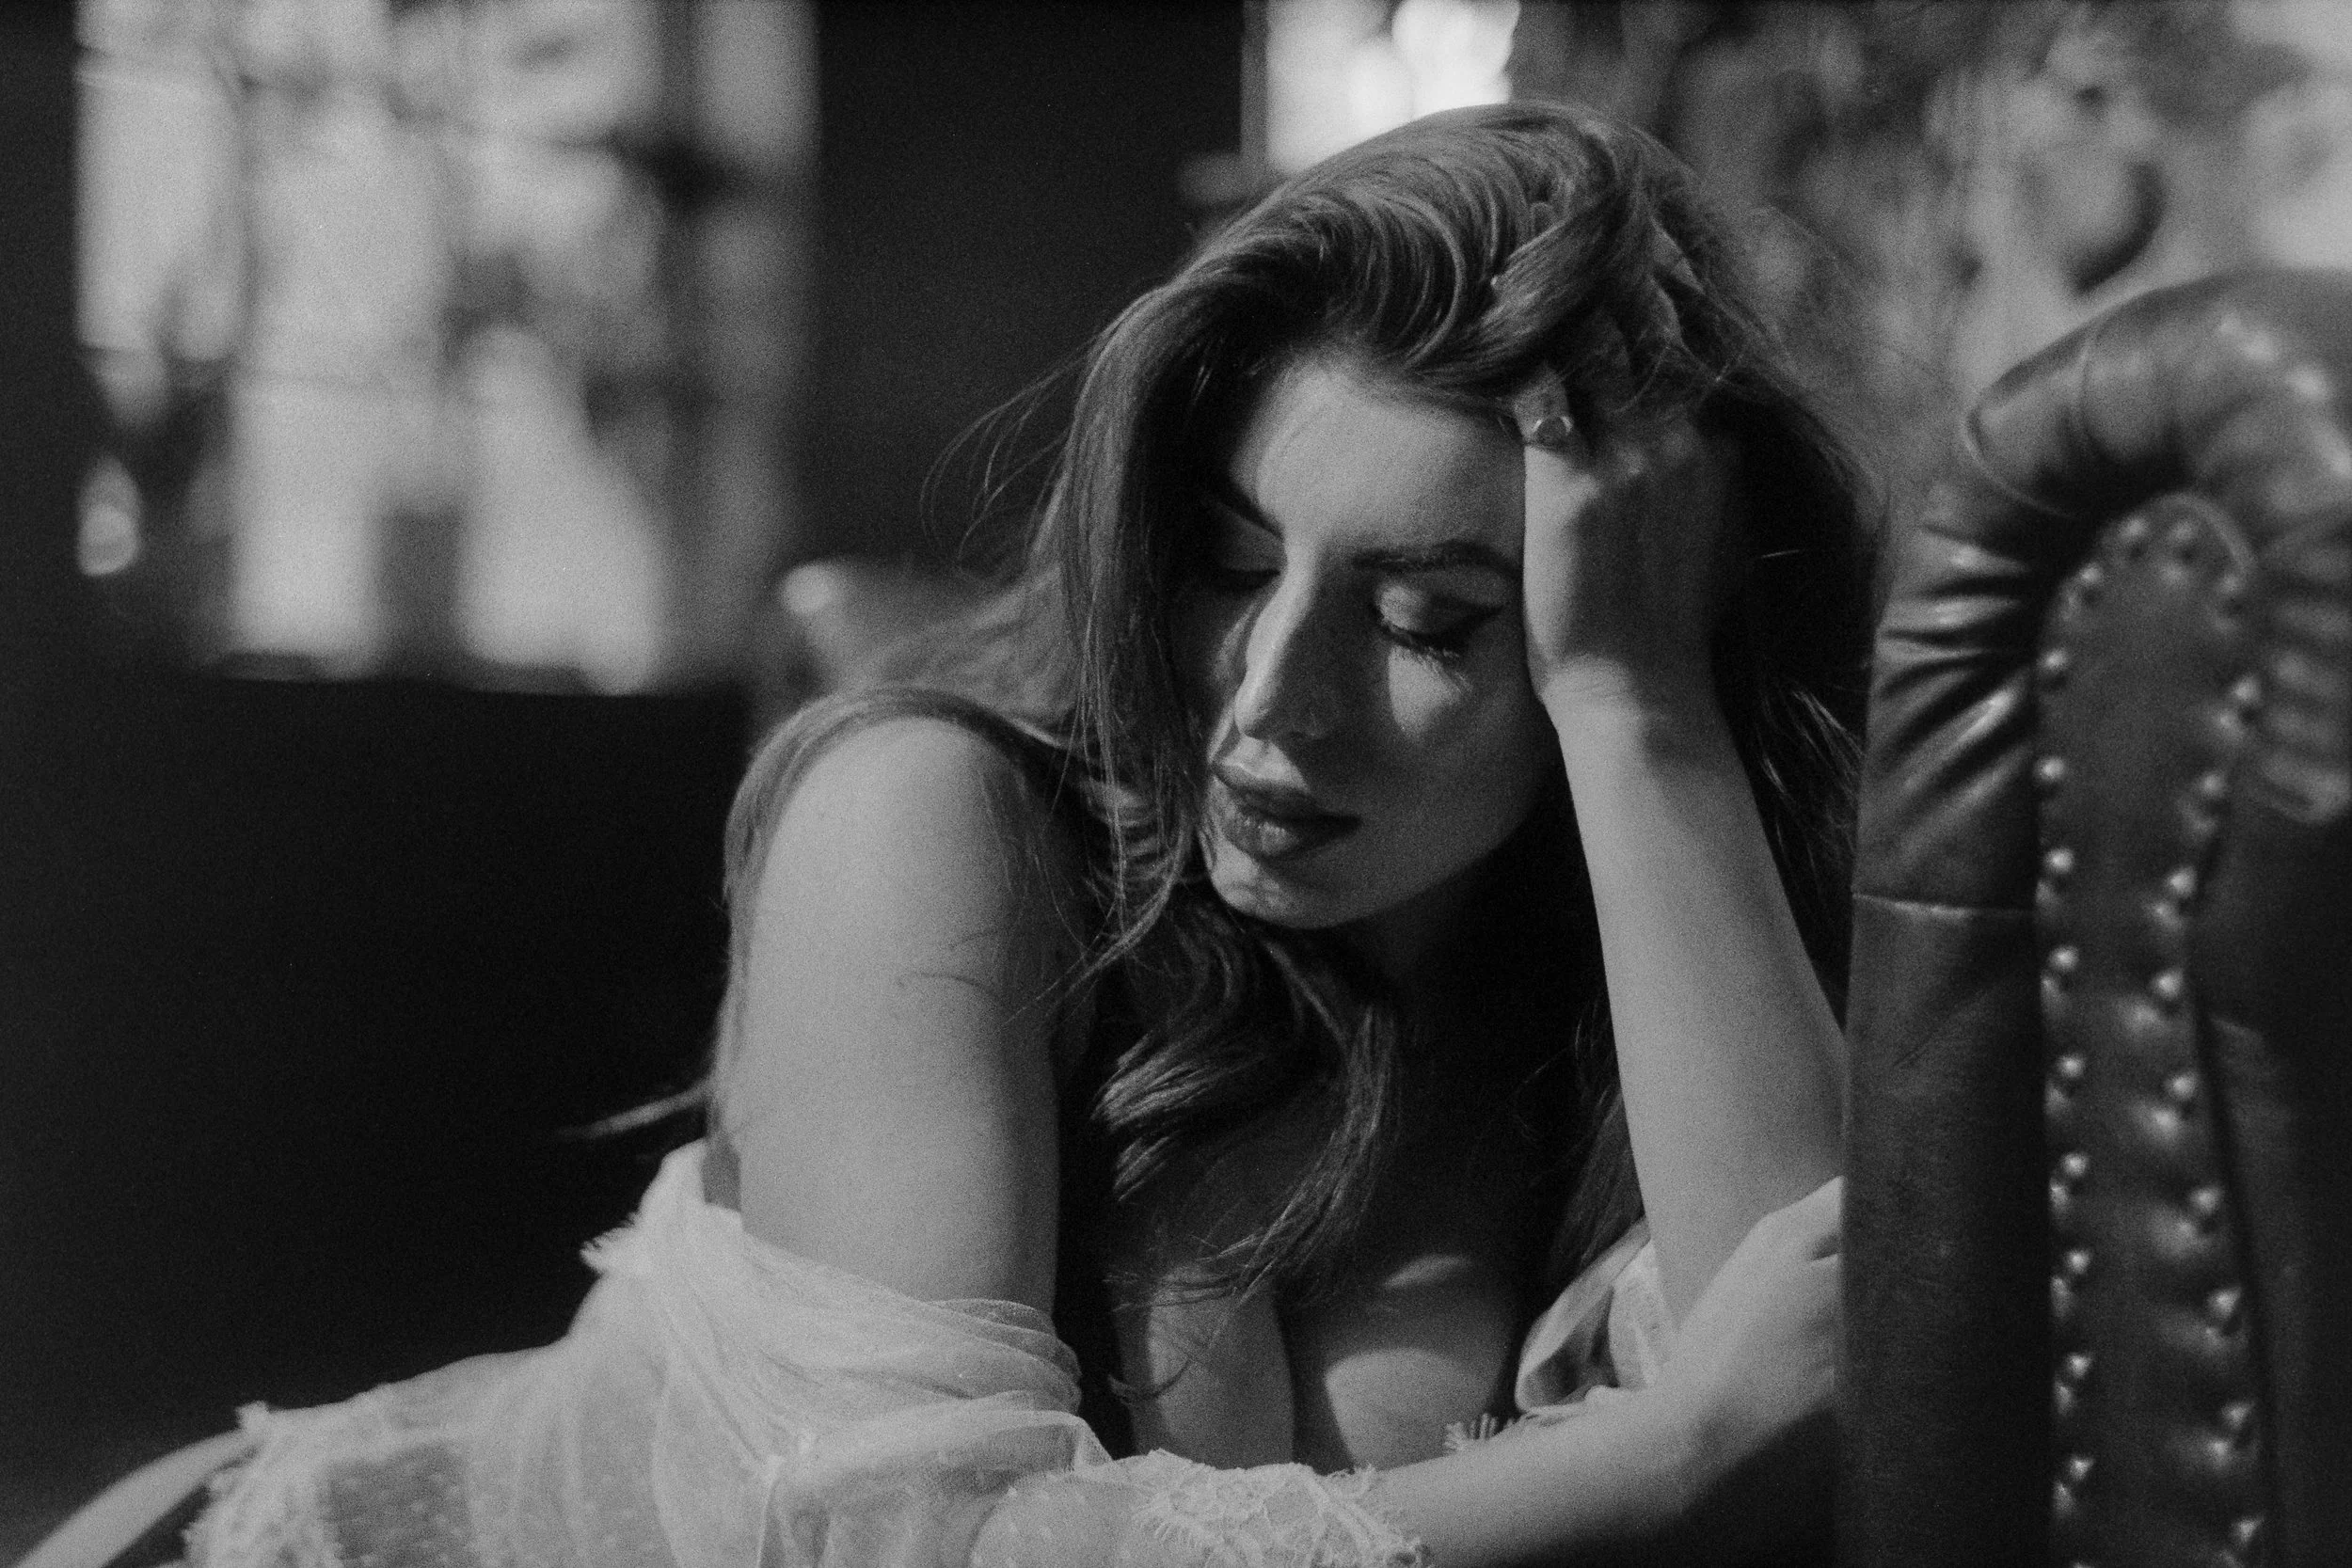
Directional portrait lighting recorded on Kodak VISION3 colour-negative film. The key light provides the principal modelling, with existing window illumination and reflected light contributing to the surrounding tones. Development and high-resolution scanning at Liquid Light Lab preserve the negative's recorded colour and density information for the finished photograph.
Three 50mm Lenses: How Optics Influence Chiaroscuro
Although lighting establishes the physical structure of a portrait, the lens influences how that structure is reproduced on film. For this session, three different 50mm designs were used: the Voigtländer Nokton 50mm f/1.1, a 1939 Zeiss Sonnar 50mm f/1.5 and the Zeiss Pancolar 50mm f/1.8.
Each represents a different approach to optical design, with characteristics that can become especially noticeable when photographing strong directional illumination.
These are practical photographic observations rather than a controlled optical test. Aperture, focus, composition and lighting conditions can also affect the visible result.
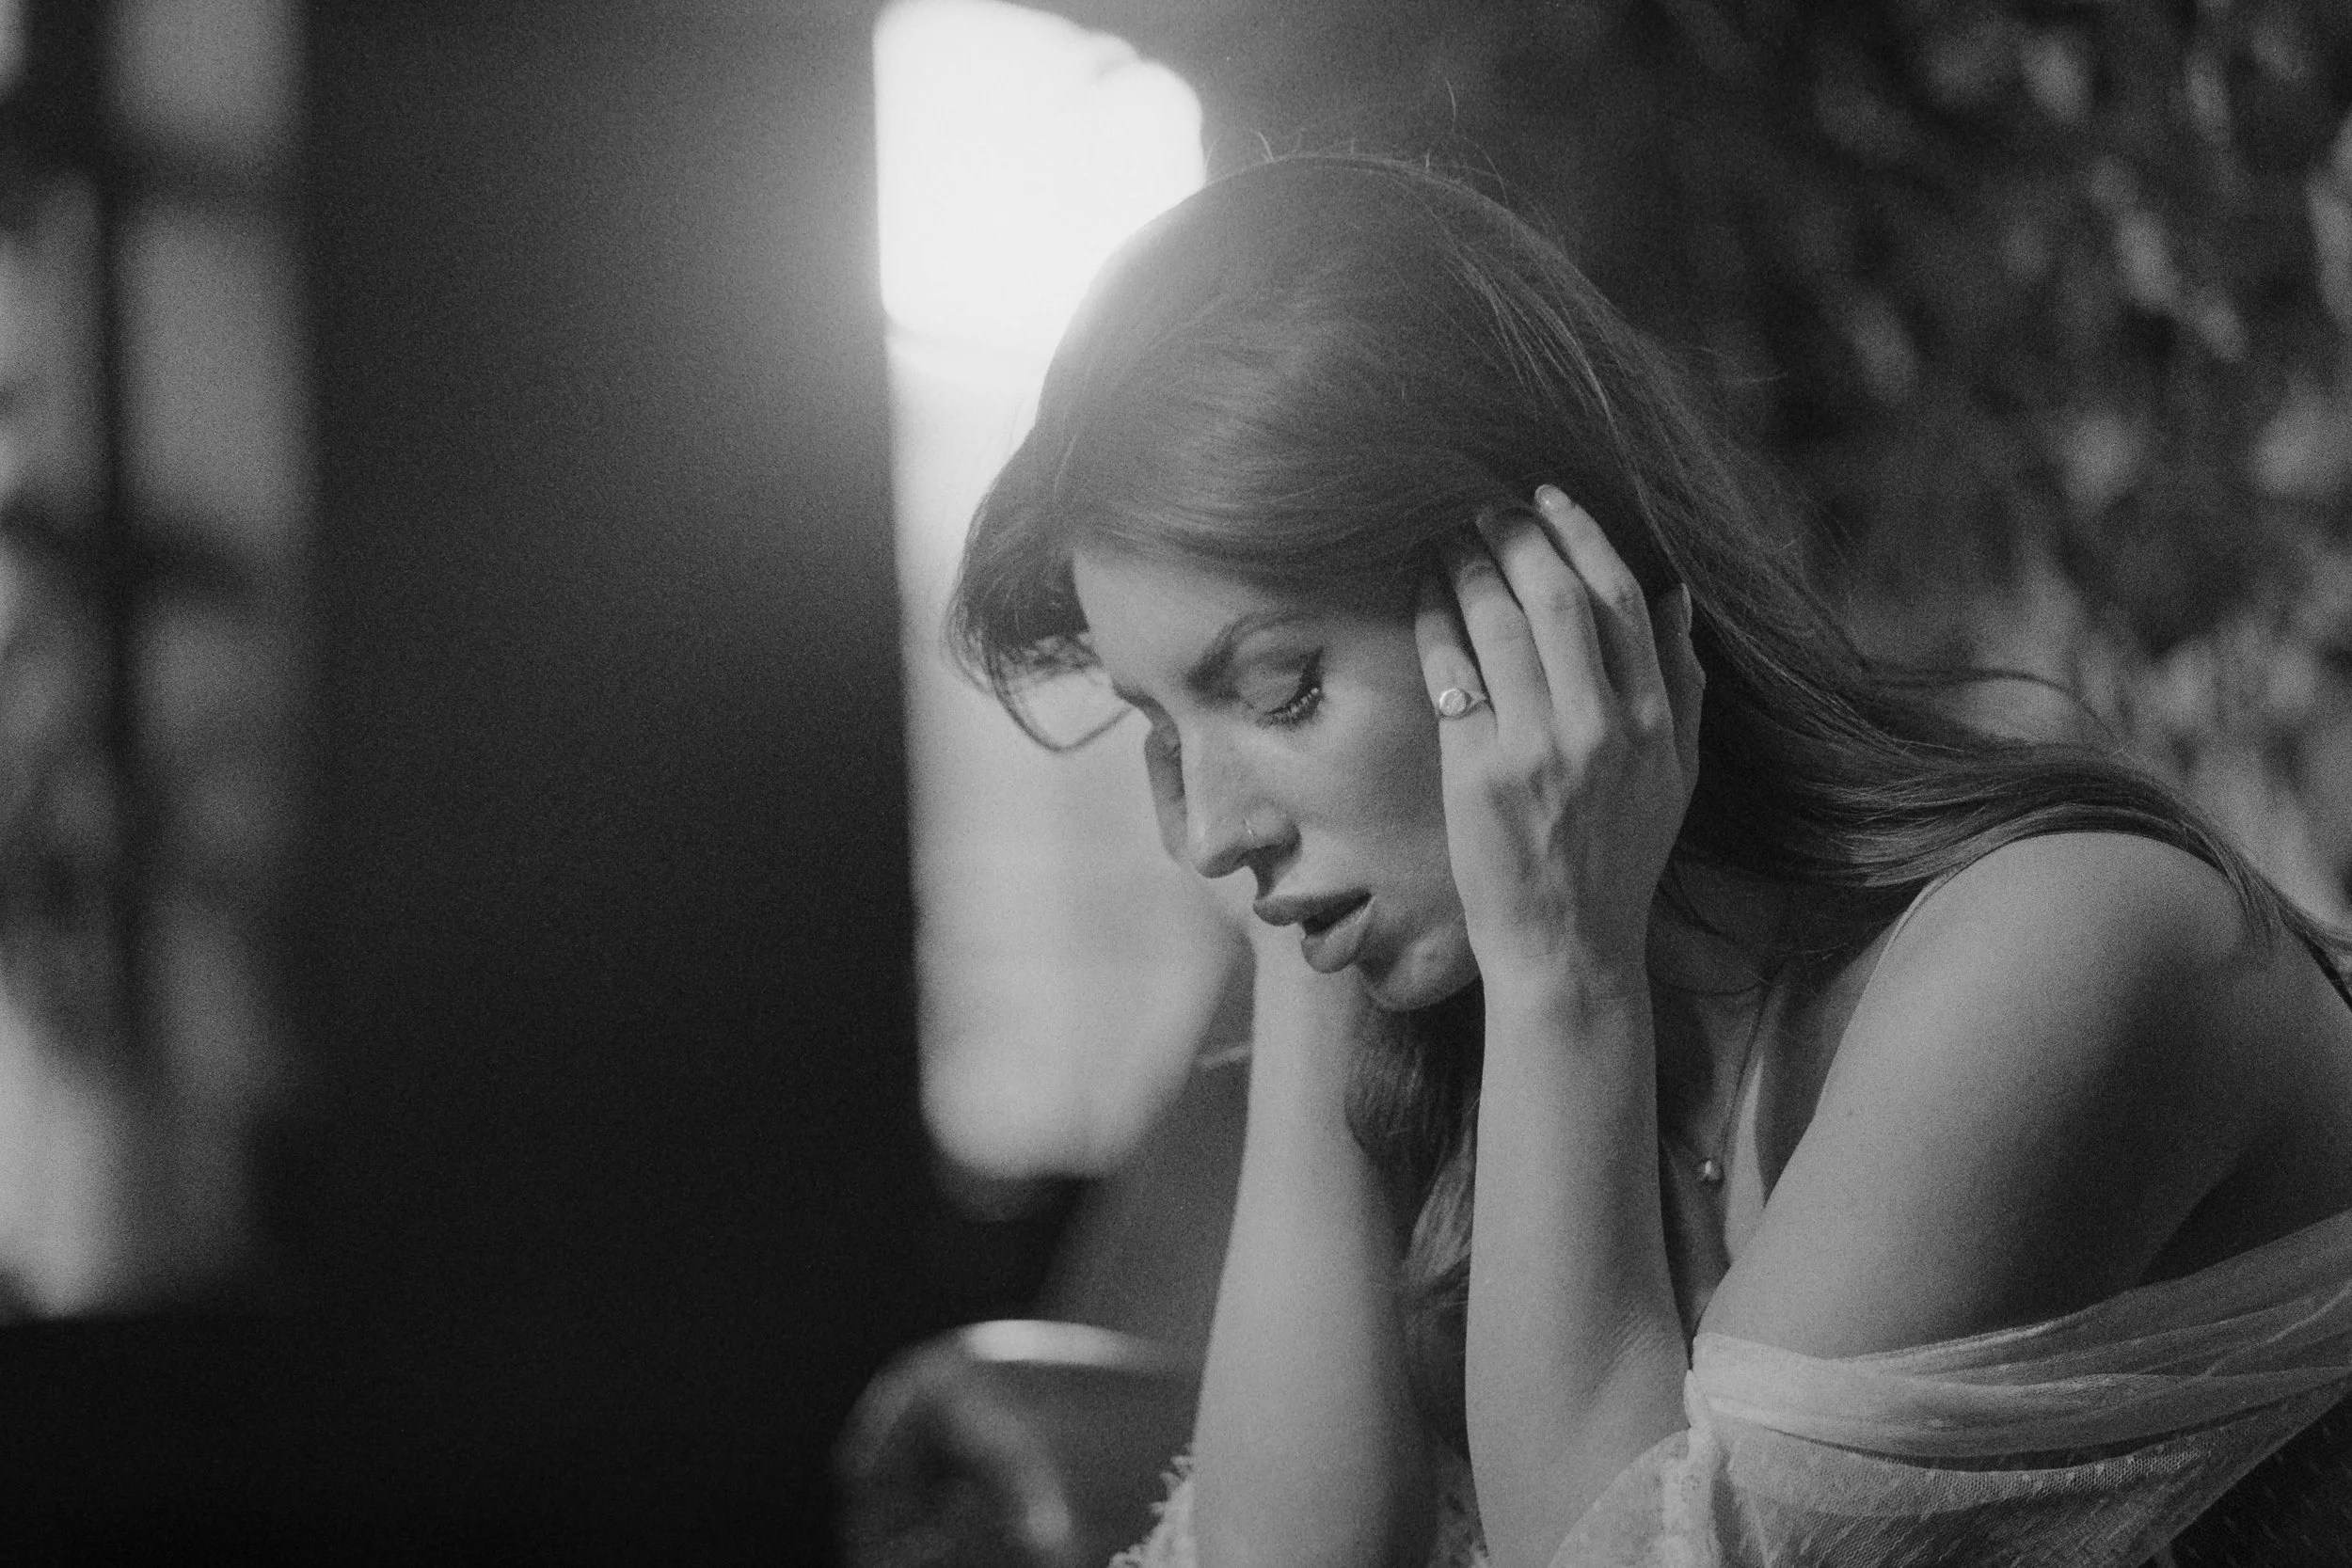
A chiaroscuro portrait shaped by a single directional key meeting controlled window lift. The Voigtländer Nokton 50 mm f/1.1 softens the transition where the key light meets the ambient window glow, producing smooth spherical falloff while keeping the core shadow intact.
Voigtländer Nokton 50mm f/1.1
The Nokton offers an unusually wide maximum aperture, allowing the photographer to work with very shallow depth of field when desired.
In a chiaroscuro portrait, this can create separation between the sharply rendered subject and a softer surrounding environment. Out-of-focus areas, optical aberrations and contrast transmission all contribute to the appearance of the photograph.
It’s important to distinguish this optical rendering from the actual lighting falloff across the subject. The lens does not change how much illumination reaches the face, but it can affect the appearance of the recorded image.
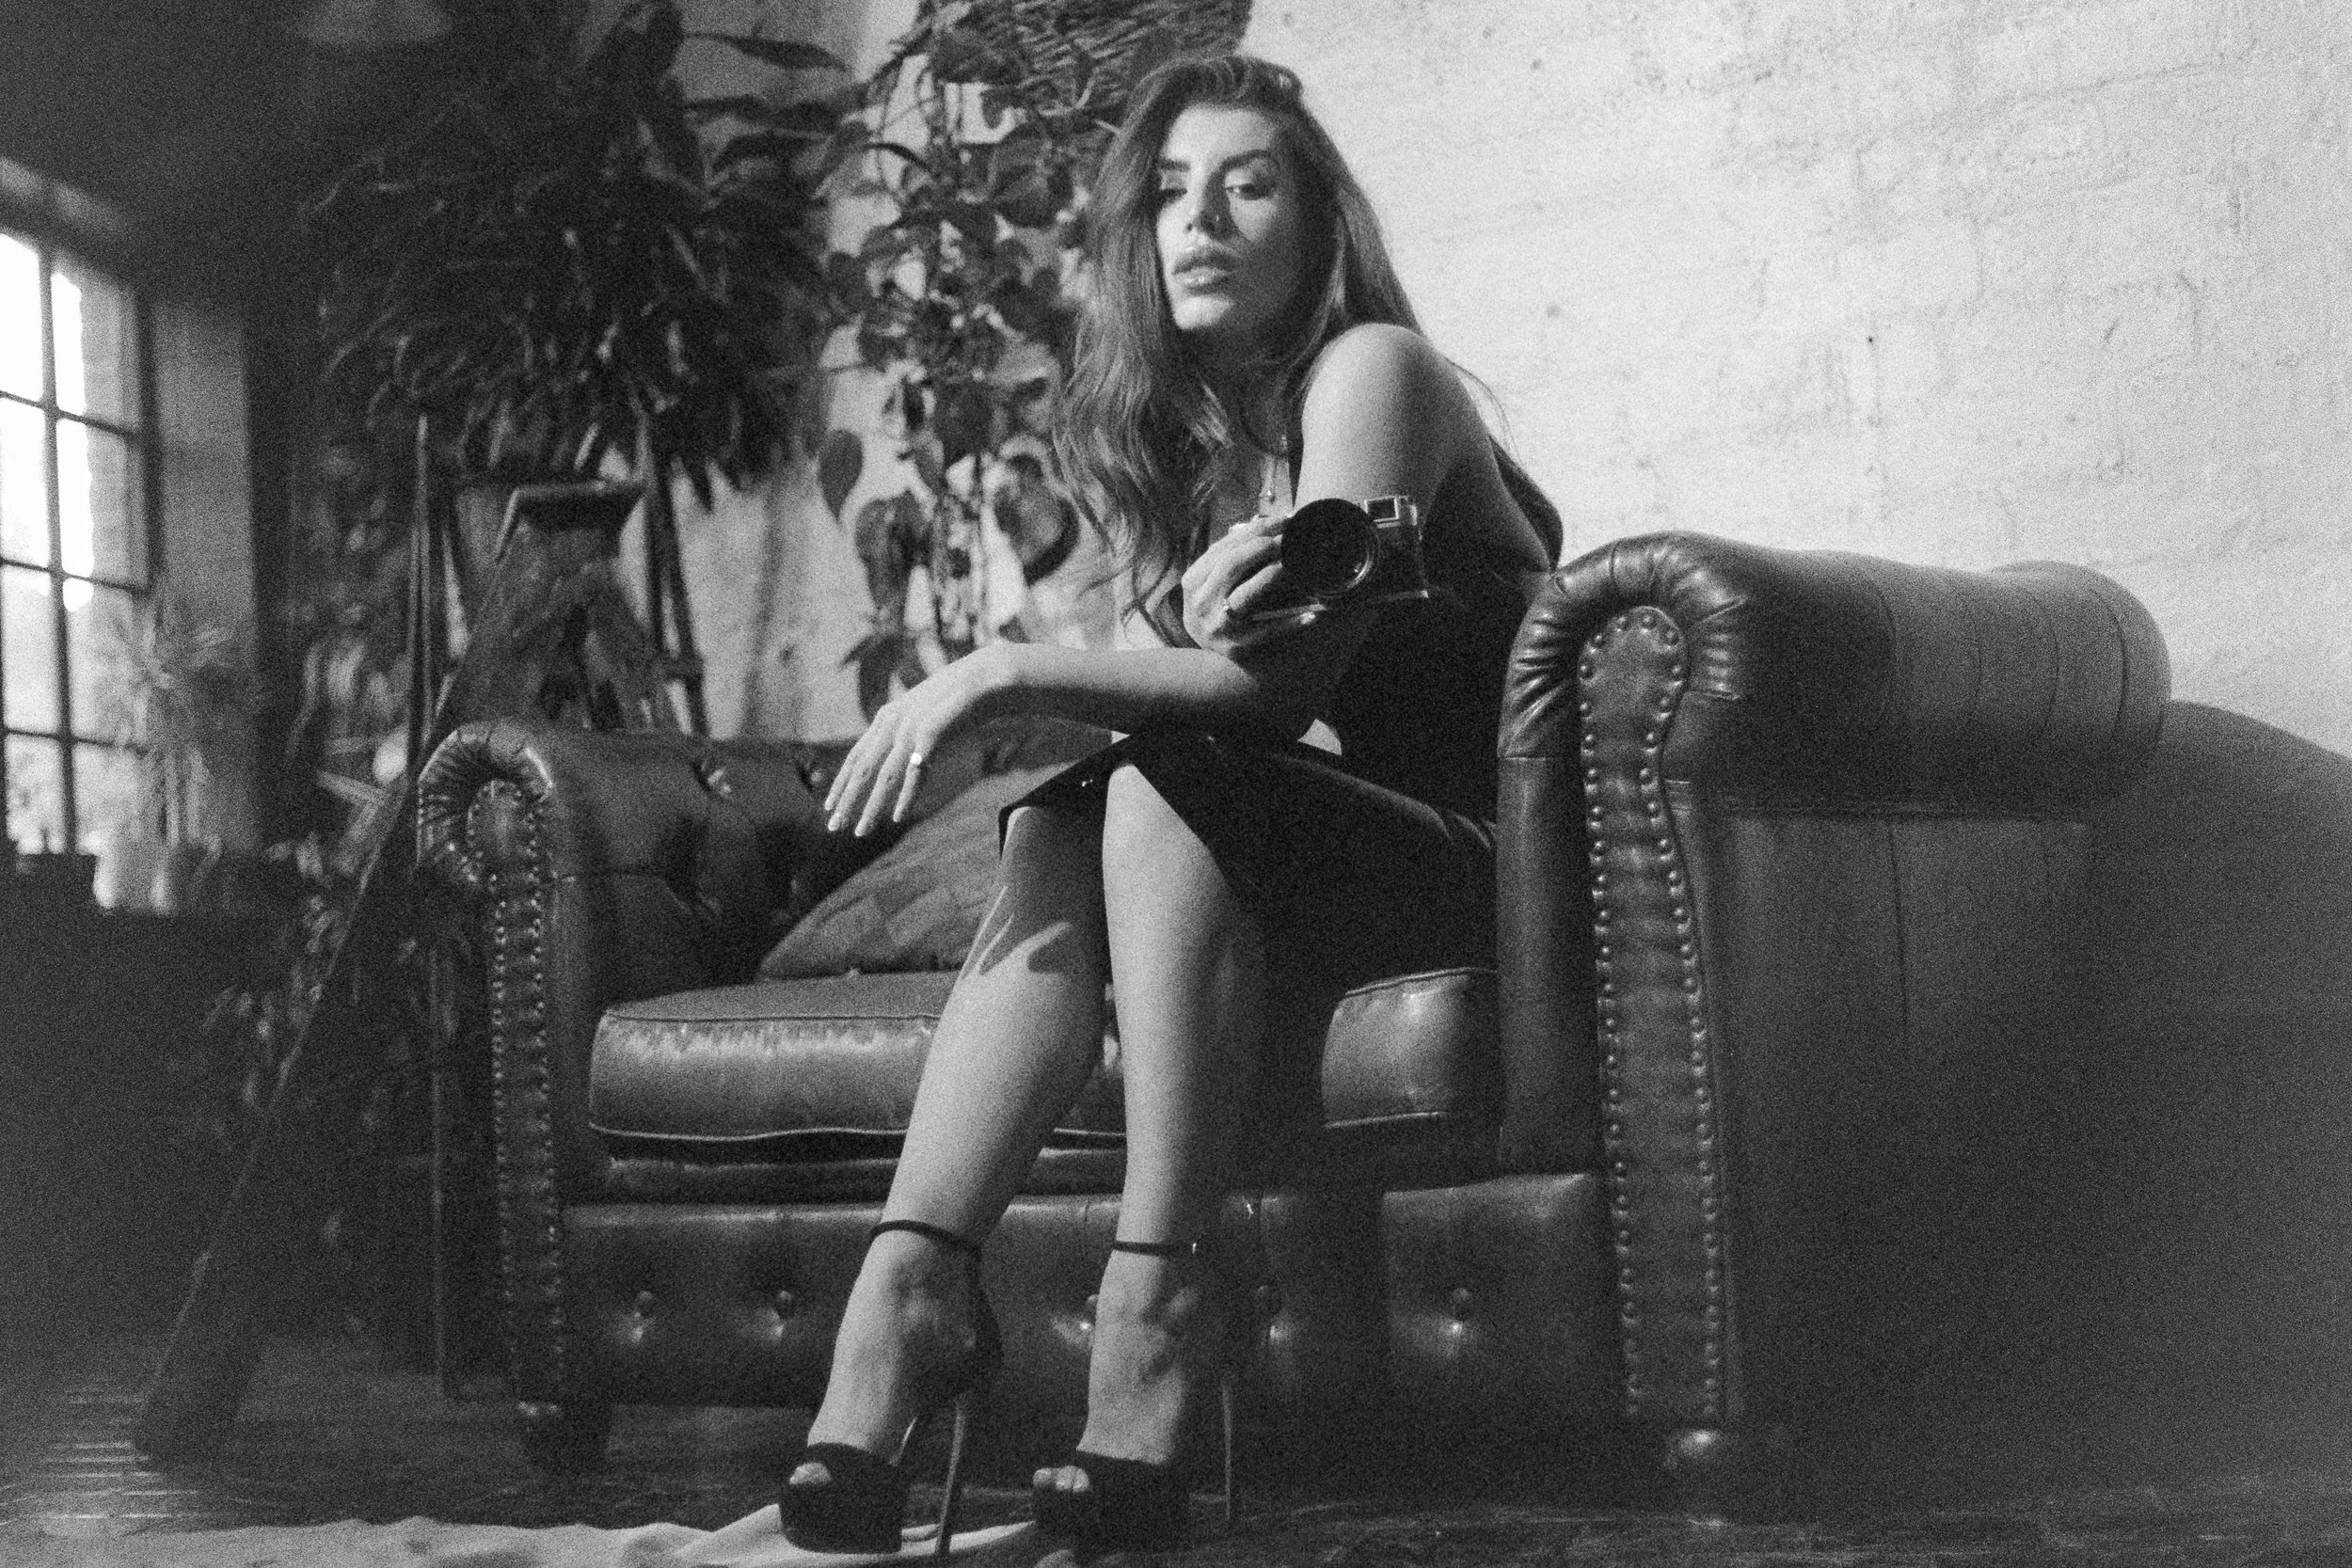
A Pancolar interpretation of the lighting: higher microcontrast tightens the shadow edge, defines the facial planes more explicitly, and produces a more graphic chiaroscuro.
Zeiss Sonnar 50mm f/1.5 — 1939
The early Sonnar offers a distinctly different optical character. Its uncoated surfaces make flare and contrast behaviour particularly relevant when photographing strongly illuminated subjects against darker backgrounds.
Depending on the lighting arrangement, veiling flare may reduce contrast in darker areas or modify the apparent separation between tonal values. These characteristics do not inherently make the lens better or worse for chiaroscuro; they simply offer the photographer a different rendering of the scene.
In the portraits shown here, the Sonnar contributes to the softer optical character of the finished photographs while the directional lighting establishes their underlying structure.
Zeiss Pancolar 50mm f/1.8
The Pancolar provides a useful contrast to the older Sonnar design. Its optical characteristics can produce a different impression of definition, local contrast and separation between sharply focused details. In strongly directional light, such differences may be visible around facial features, fabric and other finely textured surfaces.
Differences in shadow transitions should not be attributed entirely to the different lens designs without considering how the lighting was controlled, the exposure and final image.
Light First, Lens Second
The three lenses demonstrate an important distinction. Lighting determines where illumination falls and how the subject's surfaces are modelled. Film records the resulting exposure according to its sensitometric response. The lens influences the optical reproduction of that scene.
For photographers interested in the character of older optics, chiaroscuro provides an especially revealing environment in which to explore those relationships. These photographs demonstrate how creative lens selection can complement deliberate lighting without replacing the fundamentals of exposure and composition.
How Different Film Stocks Record Chiaroscuro
For this session, both black-and-white and colour-negative films were used, including Rollei RPX and Kodak VISION3.
The lighting establishes the scene's contrast, but the film's characteristic curve determines how the resulting exposure differences translate into negative density. Different emulsions can produce different relationships between shadow detail, midtone separation, grain and highlight density, even when photographed under similar lighting conditions.
A Zeiss Sonnar rendering of chiaroscuro on Rollei RPX 100 film: long, cohesive tonal transitions and gentle shadow rolloff give the portrait its sculptural softness.
Rollei RPX and Black-and-White Tonality
Black-and-white film places particular emphasis on the relationship between brightness, texture and form. Without colour as an additional visual element, the direction of light becomes especially apparent through the transition between illuminated and darker surfaces.
The portraits made on Rollei RPX 100 demonstrate this clearly. The developed negative contains a range of densities corresponding to the illumination recorded during exposure. The amount of information retained in the shadow areas depends on the exposure received and the film's response to development.
The RPX 100 examples were developed using 510 Pyro at Liquid Light Lab. As a staining developer, 510 Pyro introduces additional considerations for negative contrast and scanning. The final reproduction depends on both the developed silver image and the associated image stain.
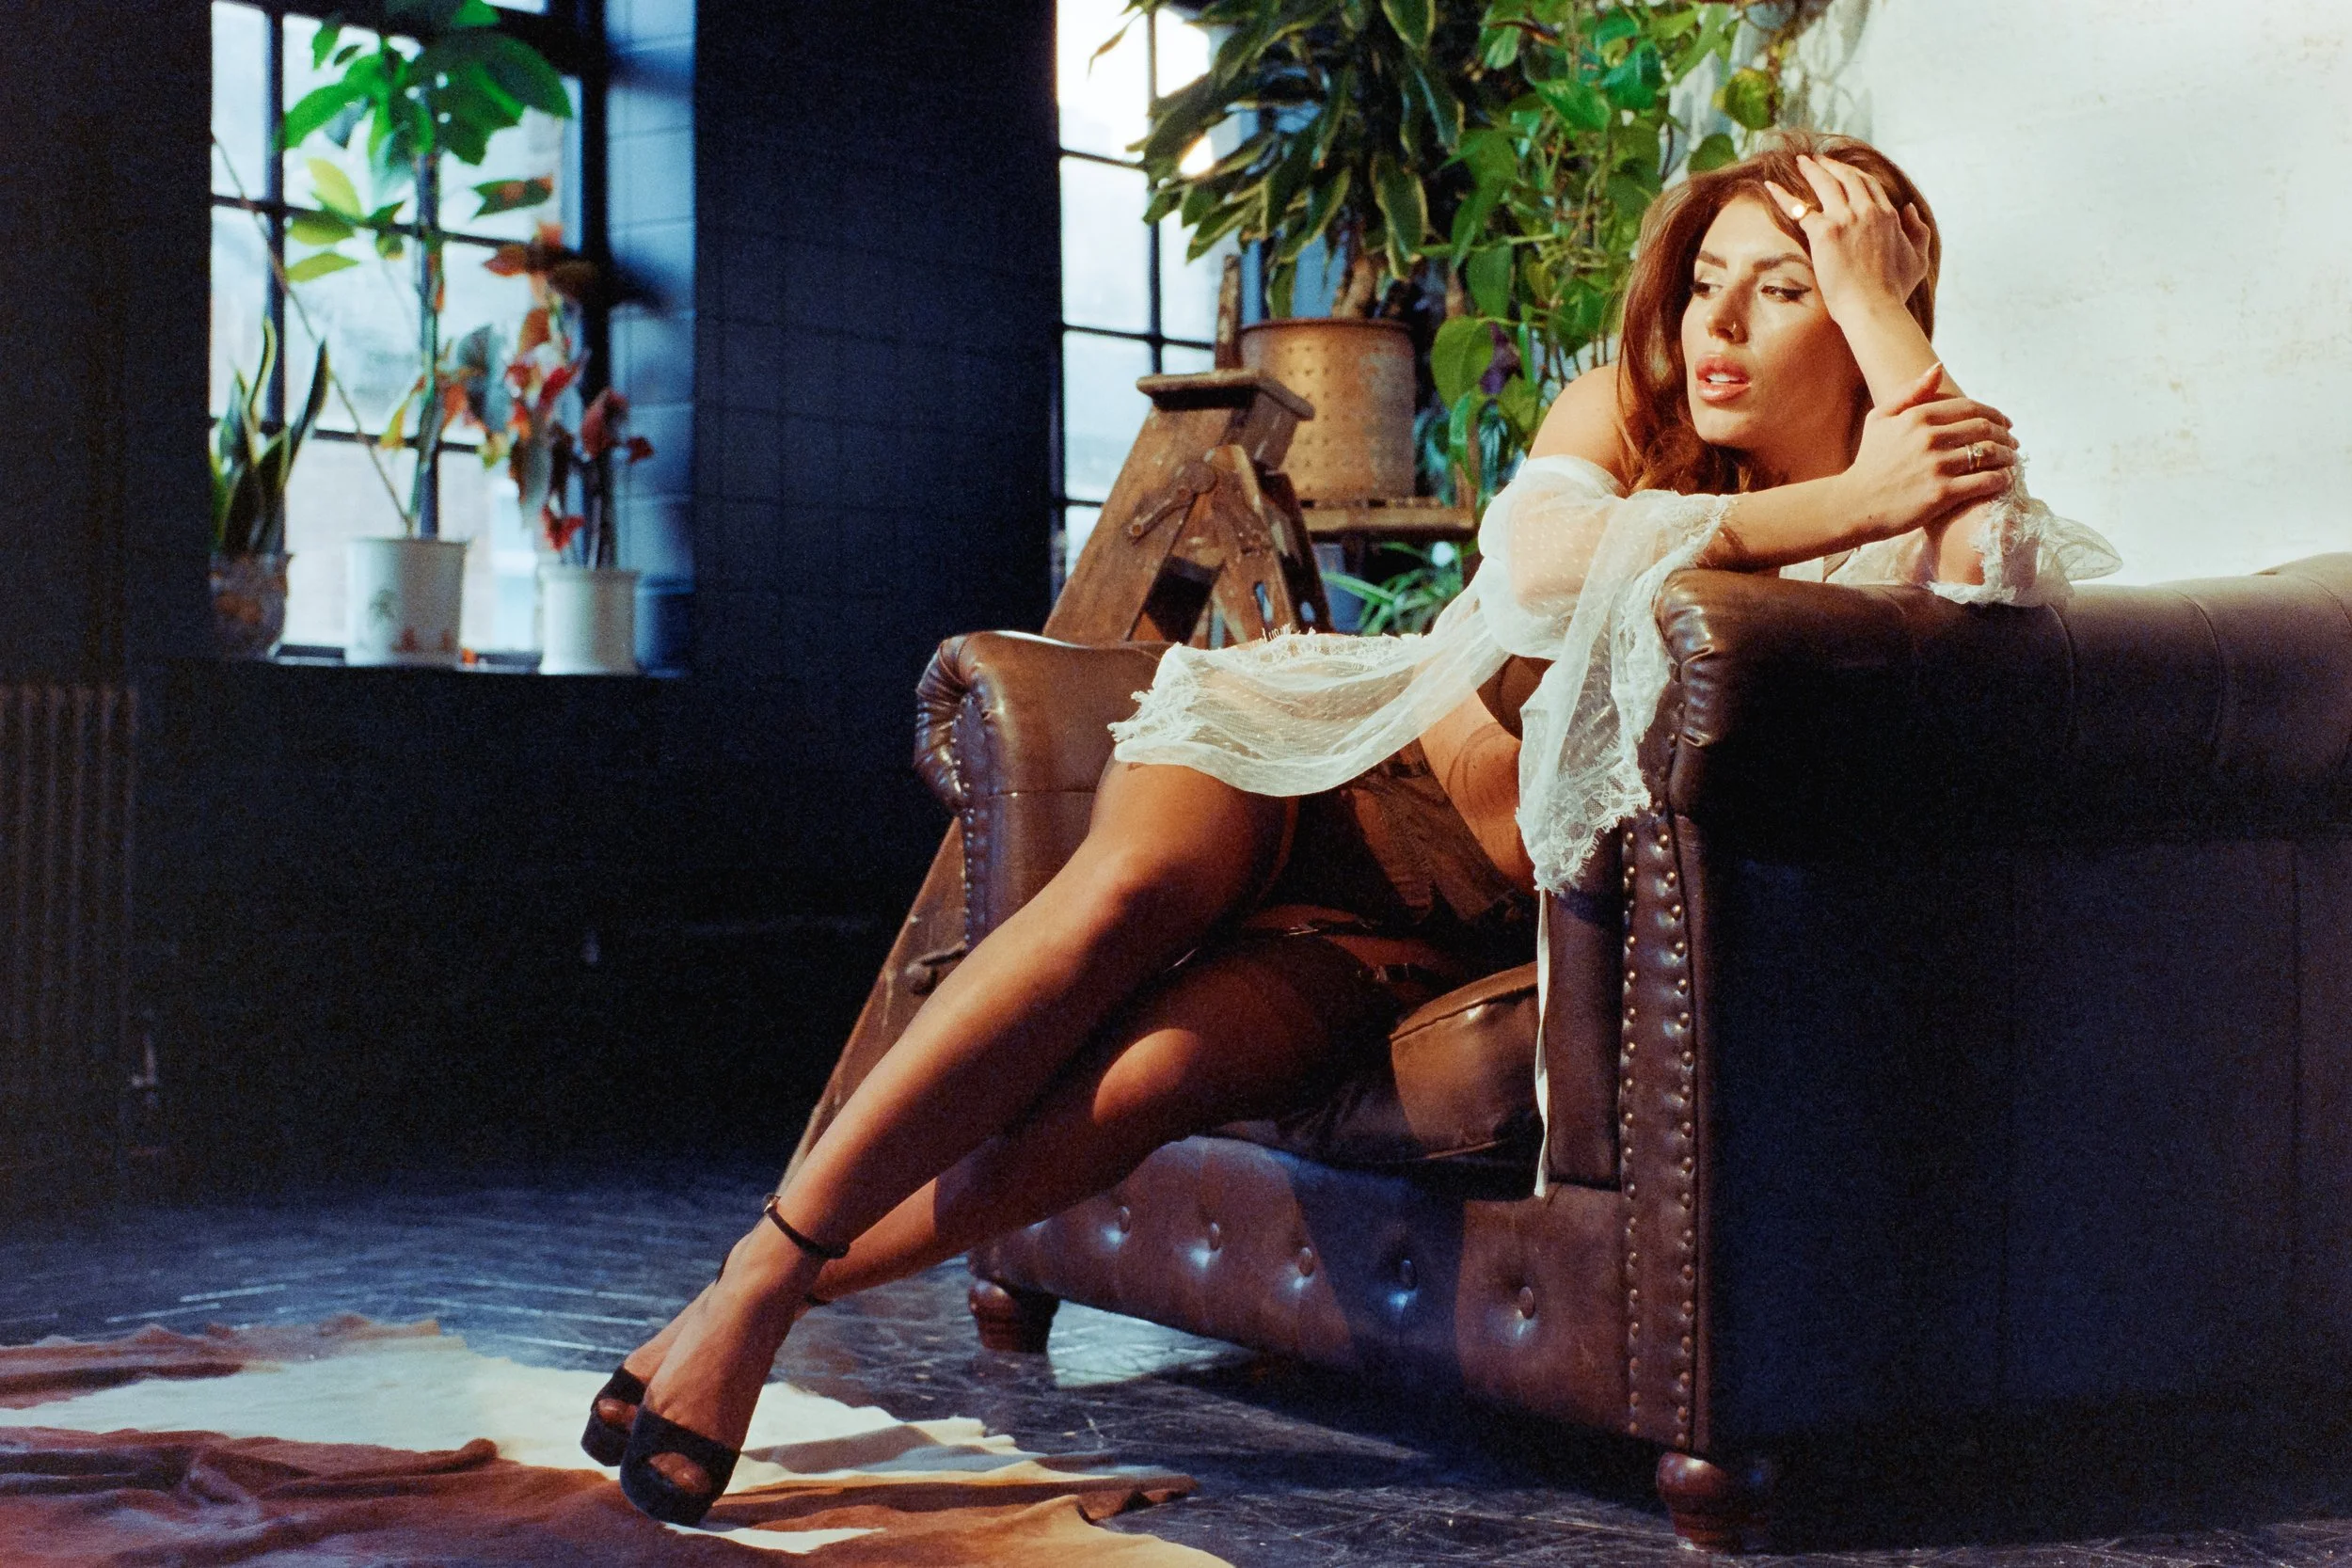
Directional light meets controlled window lift: Vision3 carries the sculptural chiaroscuro while the colour palette remains stable and the deep room falloff reinforces the scene’s depth.
Kodak VISION3 and Colour Negative Film
The colour portraits were made using Kodak VISION3, including 500T. VISION3 emulsions were designed for professional motion-picture photography, where substantial exposure latitude and flexibility during subsequent colour grading are important.
For chiaroscuro, this provides opportunities to retain distinctions between brightly illuminated skin, darker surroundings and areas containing reflected light.
The film's characteristic curve does not guarantee the recovery of detail from severely underexposed shadows, and exposure has to be carefully placed.
VISION3 500T is tungsten-balanced, making the relationship between artificial and daylight illumination an additional consideration. The spectral character of the light, any filtration and subsequent colour grading can influence the appearance of the finished image.
Exposure and Negative Density
The photographer must decide how much information should remain visible in the darker parts of the composition and ensure that those areas receive sufficient exposure to record it. The highlights must also remain within the useful exposure and reproduction capabilities of the film and scanning workflow.
The intention is not to maximise detail everywhere, and some shadows may deliberately approach black in the finished photograph. What matters most is that this is a photographic decision rather than an unintended consequence of insufficient exposure or lost scanning information.
At Liquid Light Lab, development and high-resolution scanning are treated as connected stages in preserving the tonal information recorded on the negative. This allows the photographer to make informed decisions about the final contrast, rather than having those decisions unnecessarily restricted by the digitisation process.
Case Studies from the Session
These portraits illustrate chiaroscuro functioning across different lenses, film stocks and positions in the room. The underlying logic remains consistent: a correctly shaped key light, a measured ratio and a disciplined exposure decision.
Each portrait emerges from the same structured process.
Examine each image, which also has its lens and film choice in each caption. A large parabolic modifier was used, camera left, to both emulate and blend the window light streaming through the windows. Cohesive, directed, and motivational light is the key factor in creating your image mood, depth, intent, and complexity.
A Practical Workflow for Chiaroscuro Portraiture
The lighting process used in this session can be adapted to other studios and locations.
Begin by observing the existing illumination. Identify which side of the subject will receive the primary light and which areas should remain in shadow. Introduce or position the key light to establish the intended direction and modelling.
Next, assess how much light reaches the shadow side. Reflections from walls, windows and nearby objects may provide useful fill, but they can also reduce the contrast that the photographer is trying to establish. Use negative fill or flags where necessary to control unwanted illumination.
Once the lighting relationship is established, select the film and make an exposure decision based on the information that needs to be recorded. On negative film, this includes ensuring that important shadow areas receive sufficient exposure while remaining within the useful highlight range.
Finally, consider the composition, subject positioning and lens characteristics.
The purpose of this sequence is consistency. It allows changes in camera position, lens or subject direction to be made without losing control of the underlying lighting arrangement.
The resulting negative becomes a record not just of the subject, but of the photographer's decisions about how the scene should be illuminated.

The key light shapes the face and upper body while the window on the left lifts the deep shadow values just enough to keep the chiaroscuro readable. The long falloff across the room reinforces the directional structure without flattening the contrast.
From Lighting Decisions to the Finished Photograph
The portraits in this article demonstrate chiaroscuro as a practical method rather than simply a photographic style. A dominant directional light establishes form. Ambient illumination and negative fill determine how much of the shadow side remains visible. Lens selection contributes its own optical characteristics, while film choice and exposure determine how the scene is recorded.
The final stage is the development and scanning of the negative.
At Liquid Light Lab, professional film processing and high-resolution scanning are informed by continuing practical photographic experience, including the studio work demonstrated throughout this series. Understanding the decisions made before exposure is central to understanding what the photographer expects from the finished negative.
Our C-41, ECN-2 and black-and-white services are available to photographers throughout the UK, with development-only and high-resolution scanning options.
Explore Film Developing and Scanning at Liquid Light Lab
Continue the Chiaroscuro Series
Part I — Directional Light on Film: The Foundations of Depth, Shape and Tonal Control
Part III — Control, Containment and the Discipline of Light examines how flags, negative fill, grids and other shaping tools are used to maintain directional lighting in more complex environments.
Photography and lighting: Team Light Lab
Model: Ella Rue
Film development and scanning: Liquid Light Lab
The Cinematic Notebook | Liquid Light Lab